Table of Contents
When a guest walks into a villa dining room, lounge, or private entertainment area, the wine cabinet is often one of the first details that quietly signals taste. But what happens when the cabinet looks beautiful by itself and still feels disconnected from the wall around it? The difference between a standard installation and a luxury villa feature is not only the cabinet design. It is the way the wine cabinet, wall surface, lighting, and architectural lines work together as one refined composition.
To coordinate a wine cabinet with villa walls, start by matching the cabinet’s scale, color temperature, material texture, lighting, and installation depth with the surrounding wall design. For luxury villas, the best result usually comes from a custom built-in solution: align the cabinet with wall panels, stone slabs, wood veneers, skirting lines, ceiling details, and nearby doors. Then decide whether the cabinet should blend into the wall as an integrated element or stand out as a controlled focal point.
Why Wall Coordination Matters in a Luxury Villa
A wine cabinet is not simply a place to store bottles. In high-end residential design, it becomes part of the visual language of the villa. A wall may be finished with marble, wood veneer, leather panels, microcement, architectural paint, metal trims, or decorative plaster. If the wine cabinet ignores that wall language, the final space can feel fragmented, even when expensive materials are used.
Villa owners, interior designers, architects, and developers usually want a space that feels intentional. They do not want a cabinet that appears to have been purchased after the renovation was finished. They want a cabinet that looks planned from the beginning, fits the wall precisely, and supports the lifestyle of the home. This is why custom wine cabinets are often specified during the interior design stage rather than treated as loose furniture.
A coordinated wine cabinet improves three things at the same time: visual harmony, practical usability, and perceived property value. It can make a dining room feel more complete, turn a corridor into a boutique display zone, or transform a basement lounge into a private tasting area. More importantly, it gives potential buyers and guests the impression that every part of the villa has been considered in detail.
This level of coordination is especially important in villas because the walls are larger, the ceiling heights are more generous, and the sight lines are longer than in typical apartments. A small mismatch in color, depth, or proportion becomes more obvious in an open-plan villa. A well-designed wine cabinet, on the other hand, can anchor the wall and make the entire room look more expensive without making the space feel heavy.
Step 1: Decide Whether the Wine Cabinet Should Blend In or Stand Out
Before choosing glass, metal, wood, or stone, decide the cabinet’s design role. Should it disappear into the wall, or should it become the main visual feature? This decision controls almost every later detail, including color, lighting intensity, frame thickness, handle style, panel alignment, and even bottle display angle.
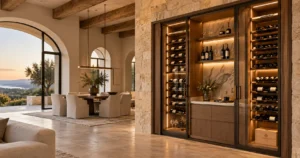
A blended wine cabinet is ideal when the villa already has a strong feature wall. For example, if the dining room wall uses dramatic marble slabs or continuous wood paneling, the wine cabinet can share the same finish language and sit within the wall like a refined architectural insert. This approach is quiet, elegant, and suitable for modern minimalist villas where the owner values calm continuity.
A focal-point wine cabinet works better when the surrounding wall is relatively simple. A neutral painted wall, light stone wall, or plain wood-paneled wall can support a darker cabinet with bronze metal, smoked glass, integrated LED lighting, and carefully arranged bottles. The cabinet becomes a controlled display, similar to a luxury boutique showcase, without overwhelming the villa interior.
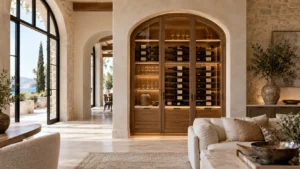
There is also a third strategy: framed integration. In this approach, the wine cabinet is visually connected to the wall but still clearly defined. A metal frame, stone border, timber portal, or recessed niche creates a precise transition between cabinet and wall. This is useful when the design needs both architectural order and product visibility. For many villa projects, framed integration is the safest premium choice because it avoids both extremes: the cabinet does not look random, but it also does not disappear completely.
Step 2: Match the Cabinet Scale With the Wall Proportion
Scale is the first technical factor that determines whether a wine cabinet looks custom or temporary. A villa wall usually has strong vertical and horizontal lines: ceiling edges, door heights, window frames, panel joints, wall lights, skirting boards, and sometimes fireplace or TV wall modules. The wine cabinet should respect these lines instead of fighting them.
For a large dining room wall, a narrow standalone cabinet can look weak. A floor-to-ceiling cabinet, a wider built-in display, or a symmetrical pair of cabinets may be more appropriate. For a corridor or transitional wall, a slimmer recessed cabinet may work better because it adds function without reducing the walking width. For a lounge wall with a TV, fireplace, or bar counter, the wine cabinet should be balanced with those existing focal points rather than competing with them.
A practical rule is to align the wine cabinet with at least one major architectural reference. The top can align with door heads or wall panel heights. The bottom can align with skirting, plinths, or low cabinetry. Vertical cabinet edges can align with wall panel joints, column lines, or ceiling feature divisions. These alignments make the cabinet feel built into the villa, even when the material is different from the wall.
Depth is equally important. A cabinet that projects too far from the wall can create a bulky appearance, especially near dining chairs or passageways. A cabinet that is too shallow may not provide proper bottle display, cooling depth, or storage flexibility. For premium villas, the cleanest result often comes from creating a prepared wall niche, recess, or panel build-out so the cabinet front sits flush or intentionally stepped with the wall surface.
Step 3: Coordinate Materials Instead of Simply Matching Them
Many people assume that coordination means using the exact same material everywhere. In luxury villa design, that approach can become flat. The goal is not always to match; the goal is to create a deliberate relationship. A wine cabinet can coordinate with villa walls through similarity, contrast, repetition, or transition.
Similarity is useful when the interior concept is calm and seamless. For example, a walnut veneer wall can include a wine cabinet with matching walnut side panels and slim smoked-glass doors. The cabinet becomes part of the wood wall, while the glass and lighting add depth. This approach works well in dining rooms, private lounges, and formal reception areas.
Contrast is useful when the wall is quiet and the cabinet needs to create impact. A light beige stone wall can support a dark bronze metal wine cabinet. A cream painted wall can support blackened steel, fluted glass, or deep espresso wood. The contrast must be controlled, not aggressive. The cabinet should still repeat at least one element from the room, such as the metal color of light fixtures, the timber tone of furniture, or the warm lighting temperature used in the ceiling.
Repetition is one of the most reliable methods. If the villa wall includes vertical grooves, the wine cabinet can repeat vertical metal lines. If the wall has horizontal stone veins, the cabinet shelf lines can echo that direction. If the room uses brushed bronze hardware, the cabinet frame can use the same metallic tone. Repetition creates visual logic and helps the cabinet feel connected to the full interior palette.
Transition is important when the cabinet meets two different wall finishes. For example, a wine cabinet may sit between a marble dining wall and a wood-paneled bar wall. In that case, a bronze or black metal frame can act as a neutral bridge. It separates the materials cleanly while giving the entire wall a more architectural appearance.
Best Material Pairings for Villa Walls and Wine Cabinets
The right pairing depends on the villa’s design language, but some combinations consistently perform well in luxury interiors. A marble wall pairs beautifully with bronze metal, smoked glass, dark oak, black walnut, or champagne stainless steel. These materials soften the coldness of stone and add a collectible-display quality to the wine area.
A wood-paneled wall works well with matching veneer, darker veneer, leather details, bronze frames, and low-reflection glass. If the wood wall is already visually rich, the cabinet should avoid too many decorative lines. A cleaner glass-and-metal structure often looks more refined. If the wood wall is very simple, the wine cabinet can introduce fluting, backlit shelves, or a warmer internal finish.
A painted wall gives the most flexibility. For a modern villa, a matte white or warm gray wall can support a black, bronze, or walnut wine cabinet. For a softer classical villa, painted wall panels can pair with antique brass, clear glass, and lightly stained wood. The key is to decide whether the wall should stay calm or become more dimensional through the cabinet design.
A microcement or plaster wall usually looks best with restrained cabinet finishes. Bronze, black metal, smoked glass, natural oak, and hidden lighting work better than overly glossy finishes. Because these wall surfaces are often used in minimalist or resort-style villas, the cabinet should feel architectural rather than ornamental.
A leather or fabric wall needs careful balance. These materials already feel warm and tactile, so the wine cabinet should introduce structure through glass, metal, or stone details. Too much soft material around a wine cabinet can make the installation feel heavy. A slim metal frame or glass front can give the wall more definition.
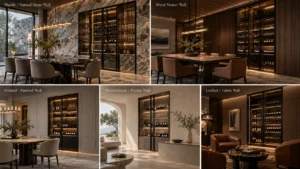
Villa Wall and Wine Cabinet Coordination Matrix
| Villa Wall Type | Recommended Cabinet Coordination | Best Application |
| Marble or natural stone wall | Use bronze, black, champagne metal, smoked glass, or dark wood to soften and frame the stone. | Formal dining rooms, entrance display walls, luxury lounges |
| Wood veneer wall | Match the veneer for a seamless look or use darker glass and slim metal lines for depth. | Private dining rooms, studies, villa basements |
| Painted or paneled wall | Create a focal point with contrasting cabinet color, integrated lighting, and clean proportions. | Modern dining rooms, corridors, entertainment areas |
| Microcement or plaster wall | Keep the cabinet restrained with matte metal, warm wood, smoked glass, and recessed installation. | Minimalist villas, resort-style villas, gallery-style interiors |
| Leather, fabric, or soft wall finish | Add structure with glass and metal rather than repeating too much soft texture. | Private lounges, cigar rooms, boutique-style tasting areas |
Step 4: Control Color Temperature and Undertone
Color coordination is not only about choosing light or dark. The undertone of the wall and the cabinet must work together. A warm beige wall can look uncomfortable beside a cold blue-gray metal. A cool gray wall can make yellow wood appear too orange. A luxury villa interior usually needs a controlled palette, and the wine cabinet should stay inside that palette.
Start by identifying whether the wall is warm, cool, or neutral. Warm walls include beige stone, cream paint, walnut, oak, travertine, warm plaster, and bronze-toned panels. Cool walls include gray marble, silver metal, cool white paint, blue-gray stone, and black glass. Neutral walls include balanced greige, soft white, taupe, and some matte stone finishes. Once the wall undertone is clear, choose cabinet finishes that support it.
For warm villa walls, consider walnut, oak, bronze, champagne stainless steel, warm black, smoked bronze glass, or amber lighting. For cool villa walls, consider black metal, dark gray glass, silver stainless steel, cool brown veneer, or clear glass with neutral lighting. For neutral walls, the cabinet can move warmer or cooler depending on the furniture, flooring, and lighting plan.
A common mistake is using bright white LED lighting inside a warm wall composition. Wine bottles, wood shelves, and bronze frames usually look more premium under warm or neutral-warm light. At the same time, the lighting should not be so yellow that labels look distorted. A balanced lighting strategy allows the cabinet to feel inviting while still making the bottles and materials easy to see.
Step 5: Use Lighting to Connect the Cabinet and the Wall
Lighting is one of the strongest tools for coordinating a wine cabinet with villa walls. Without lighting, even a beautifully made cabinet can look like a dark box. With the wrong lighting, the cabinet can look like a showroom display that does not belong in a private home. The best lighting is integrated, layered, and consistent with the room atmosphere.
Internal shelf lighting can highlight bottle shapes and labels. Vertical LED strips can emphasize height and make the cabinet feel more architectural. Backlighting can create depth when the cabinet has translucent stone, glass shelves, or textured back panels. Wall washing can softly connect the cabinet to the surrounding wall, especially when the cabinet is recessed into a niche.
For villa walls, avoid harsh points of light that reflect directly on glass doors. Reflections are more obvious in large open-plan spaces, especially when the wine cabinet faces windows, chandeliers, or glossy marble. Low-glare linear lighting, concealed channels, and matte internal finishes often produce a more refined result.
Lighting temperature should also coordinate with the villa’s general lighting scheme. A wine cabinet in a warm dining room should not use cold, bluish light. A wine cabinet in a contemporary gallery-style villa may use a slightly cleaner white, but it should still feel comfortable. The cabinet should look attractive both during daytime and evening use. In many projects, designers test finish samples under the actual lighting condition before final production.
Step 6: Align the Cabinet With Wall Panels, Doors, and Architectural Lines
Luxury villa walls often include panel divisions, hidden doors, wall-mounted lighting, decorative moldings, ceiling slots, air-conditioning outlets, or stone slab joints. These elements create a rhythm. If the wine cabinet ignores that rhythm, the wall can feel unbalanced. If the cabinet follows it, the entire elevation looks custom-made.
Start with the wall elevation drawing. Identify the major vertical and horizontal references, including door height, window height, skirting height, ceiling drop, panel joint spacing, and any built-in furniture. Then place the wine cabinet so its edges, frames, shelves, or lighting strips align with one or more of those references. This does not mean every line must match. Too much alignment can feel stiff. But a few intentional alignments create order.
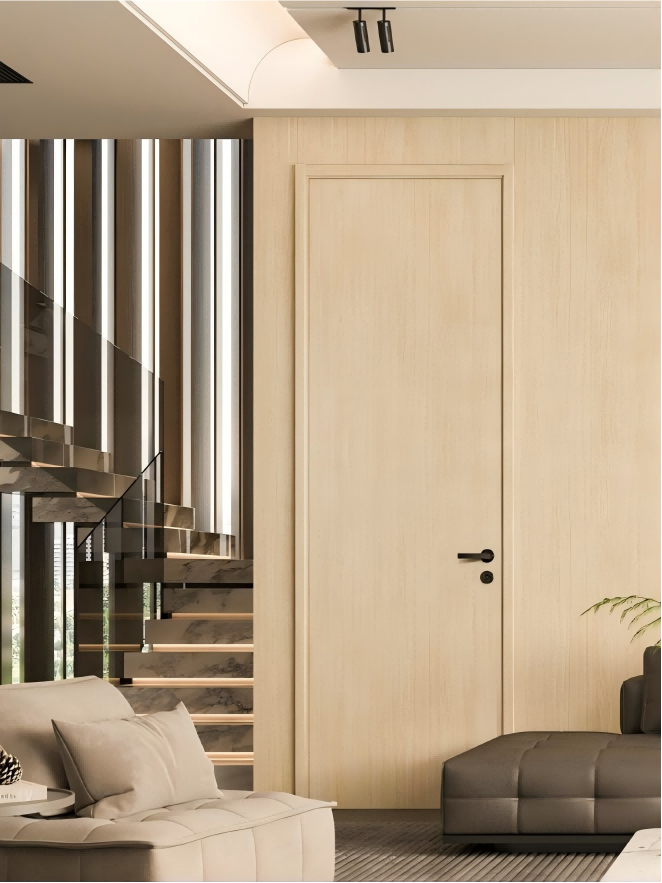
For example, a full-height wine cabinet can align with a hidden door next to it, making the entire wall look continuous. A low wine cabinet under a wall panel can align with a sideboard or bar counter. A central wine display can align with a chandelier, dining table centerline, or ceiling feature. These decisions may seem small, but they are exactly what separates high-end villa design from ordinary furniture placement.
Handle details should also respect the wall design. If the wall is clean and minimal, consider push-open doors, recessed pulls, or slim integrated handles. If the villa has decorative metal trims, a refined handle in the same metal finish can create continuity. If the cabinet uses glass doors, the frame thickness should coordinate with nearby window or door frames.
Step 7: Choose the Right Installation Method
There are three common ways to install a wine cabinet with villa walls: freestanding, semi-built-in, and fully built-in. Each method can work, but they create very different visual effects.
A freestanding wine cabinet is the simplest solution. It can be moved and installed faster, but it is harder to make it look fully integrated with the wall. This option may be suitable for a temporary villa, a renovation with limited wall modification, or a room where the cabinet is designed as furniture rather than architecture. To make a freestanding cabinet feel more coordinated, match the cabinet finish with nearby furniture and leave enough breathing space around it.
A semi-built-in wine cabinet is placed within a prepared wall zone, niche, or cabinetry surround. It may not be completely flush, but it visually belongs to the wall. This is a strong option for renovation projects because it balances flexibility and custom appearance. The surrounding wall can use matching panels, stone borders, or metal trims to make the cabinet look intentional.
A fully built-in wine cabinet is the premium solution for villas. The cabinet is designed together with the wall elevation, often with custom dimensions, integrated lighting, ventilation planning, concealed wiring, and matching finishes. This method provides the most seamless result and is usually preferred for luxury villa dining rooms, wine rooms, entertainment lounges, and showpiece walls.
If the cabinet includes active cooling, the installation method must also consider ventilation, heat dissipation, service access, and power supply. A beautiful flush wall design can fail if the cooling system is not planned correctly. For serious wine storage, the designer and cabinet supplier should clarify whether the project requires decorative display, short-term serving storage, or controlled long-term wine preservation.
Step 8: Coordinate Display Style With the Villa Atmosphere
The way bottles are displayed affects how the cabinet relates to the wall. In a formal villa dining room, symmetrical bottle storage, clear vertical lines, and refined lighting may feel appropriate. In a relaxed resort-style villa, open shelving, warm wood, and softer lighting may look more natural. In a contemporary entertainment lounge, angled bottle displays, dark glass, and illuminated back panels can create a stronger visual statement.
Label-forward display is useful when the owner wants the wine collection to be visible and easy to browse. It creates a boutique feeling and works well in feature walls. Neck-forward display stores more bottles and feels more restrained. A mixed display combines presentation shelves for selected bottles with deeper storage for larger capacity. For villa projects, a mixed approach often delivers the best balance between visual impact and practical storage.
The cabinet back panel is another key detail. A mirror back can increase depth, but it may create too many reflections in a glossy villa interior. A wood back adds warmth. A stone back connects well with marble or travertine walls. A metal back looks sharper and more contemporary. A leather or textured back can make the cabinet feel intimate, but it should be used carefully to avoid visual heaviness.
Glass selection also matters. Clear glass feels open and transparent, but it exposes every shelf and bottle arrangement. Smoked glass is more forgiving and creates a premium mood. Bronze glass coordinates well with warm interiors. Fluted glass can soften the view and add privacy, but it may reduce label readability. In many luxury villa projects, smoked or bronze glass with slim metal frames gives the most balanced result.
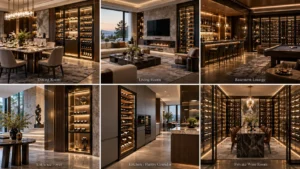
Room-by-Room Coordination Ideas
In a villa dining room, the wine cabinet should support hospitality. It should be close enough for serving but not so close that it interrupts circulation around the table. A wall behind or beside the dining area is often ideal. If the wall uses stone or wood panels, a built-in cabinet with warm lighting can become a natural extension of the dining experience.
In a living room, the wine cabinet should not compete aggressively with the TV wall, fireplace, or main view. A side wall, transition wall, or integrated bar wall often works better than the central entertainment wall. If the living room already has a strong focal point, the wine cabinet should use quieter glass, darker framing, and lower lighting intensity.
In a basement lounge or entertainment room, the wine cabinet can be more dramatic. Dark walls, bronze metal, integrated bars, tasting counters, and larger bottle capacity can work well. Because basement spaces often have fewer windows, lighting becomes especially important. The cabinet can help create atmosphere while also improving the perceived value of the lower level.
In an entrance foyer, a wine cabinet should be more sculptural and controlled. It should not look like kitchen storage. A framed display niche, limited bottle selection, and premium materials are more appropriate than high-density storage. The goal is to create a first impression of lifestyle, not to show every bottle the owner owns.
In a kitchen or pantry corridor, the wine cabinet should coordinate with surrounding cabinetry and appliances. Here, practicality matters more. The finish can match kitchen cabinets or create a refined transition toward the dining room. If cooling equipment is included, ventilation and service access should be coordinated early.
In a private wine room, wall coordination becomes the whole design concept. The cabinet system, wall cladding, ceiling, flooring, lighting, and tasting table should be designed together. In this setting, custom modular wine cabinets, glass partitions, climate control, and premium wall materials can turn storage into a complete destination inside the villa.
Common Design Mistakes to Avoid
The first mistake is treating the wine cabinet as an isolated product. A cabinet may look impressive in a catalog image, but the villa wall determines whether it will look refined on site. Always evaluate the cabinet against the actual wall finish, flooring, ceiling, lighting, and furniture plan.
The second mistake is using too many luxury materials at once. Marble, bronze, dark glass, mirror, leather, and strong lighting can all be premium, but together they may become excessive. A high-end wine cabinet should have hierarchy. Choose one dominant material, one supporting material, and one accent detail. This creates sophistication rather than visual noise.
The third mistake is ignoring wall depth. A cabinet that protrudes awkwardly may look like an afterthought. A cabinet that is recessed without proper planning may compromise ventilation, wiring, or access. The best result comes from coordinating the wall structure and cabinet dimensions before production.
The fourth mistake is choosing lighting only for brightness. Wine cabinets need atmosphere, not simply illumination. Lighting should highlight the bottles, define the cabinet shape, and connect with the wall surface. It should not create glare, harsh reflections, or uneven hot spots.
The fifth mistake is forgetting maintenance. Fingerprints on glossy glass, difficult access to back corners, poorly planned LED replacement, and hard-to-clean grooves can reduce long-term satisfaction. Villa clients expect beauty, but they also expect the details to work quietly every day.
How to Brief a Custom Wine Cabinet Supplier
If you want the wine cabinet to coordinate precisely with villa walls, the supplier needs more than a rough size. A professional brief should include the wall elevation, floor plan, ceiling height, nearby door and window dimensions, wall finish references, color codes, lighting concept, bottle capacity target, cooling requirements, and preferred opening method.
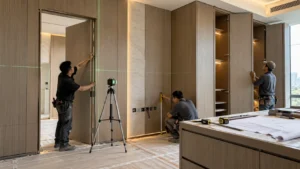
Photographs and renderings are useful, but measured drawings are better. The supplier should know whether the cabinet will be installed before or after wall panels, whether the wall niche already exists, whether there are power outlets inside the wall, and whether ventilation paths are available. These practical details affect the final appearance as much as the visible finish.
Finish samples are essential for villa projects. A small difference in wood tone, metal color, or glass tint can become obvious on a large wall. Before confirming production, request material samples and compare them under the villa’s lighting condition. If the wall uses natural stone or veneer, send the supplier actual samples or high-quality photographs so they can recommend compatible finishes.
For international villa projects, also clarify packaging, shipping method, installation support, assembly instructions, spare parts, and after-sales service. A luxury custom cabinet must arrive safely, fit accurately, and be installable by the local contractor. Good coordination is not only design; it is also project management.
What Information Should You Send When Requesting a Quotation?
A serious inquiry should include the project location, villa style, room type, wall dimensions, required cabinet size, bottle capacity, preferred material, cooling or non-cooling requirement, installation method, and target delivery schedule. If you already have interior renderings or construction drawings, send them together. This allows the supplier to recommend a solution that fits the wall instead of offering a generic cabinet.
For example, a designer may send a message such as: ‘We are designing a modern villa dining room with a 4.2-meter-wide walnut wall. We need a built-in wine cabinet with smoked glass doors, bronze metal frame, warm internal lighting, and space for approximately 120 bottles. The cabinet should align with the wall panel joints and sit flush with the surrounding panels. Please provide design suggestions, material options, and quotation.’
This kind of inquiry is much easier for a supplier to answer accurately. It also helps the supplier identify potential issues early, such as ventilation, door swing, shelf depth, installation sequence, and color matching. The more precise the inquiry, the faster the project can move from concept to design proposal.
Design Checklist Before Final Approval
Before approving the wine cabinet design, check the wall elevation as a complete composition. Confirm that the cabinet width, height, and depth are suitable for the wall. Confirm that the cabinet edges align with important architectural lines. Confirm that the cabinet finish coordinates with the wall, floor, ceiling, and furniture. Confirm that the lighting color and brightness are appropriate. Confirm that the cabinet can be installed, ventilated, maintained, and serviced.
Also check the way the cabinet will look when it is full of bottles. Empty renderings often look cleaner than real life. A practical wine cabinet should still look elegant when different bottle shapes, label colors, and accessories are placed inside. Adjustable shelving, mixed display zones, and controlled lighting can help maintain order.
Finally, review the cabinet from the main viewing angles. In a villa, the cabinet may be seen from the entrance, dining table, staircase, corridor, or open living area. A design that looks balanced from one angle may look awkward from another. The best custom solution considers both the front elevation and the real movement of people through the space.
Recommended Coordination Strategies by Villa Style
For a modern minimalist villa, use flush installation, slim metal frames, matte finishes, smoked glass, and concealed lighting. The cabinet should feel like a precise architectural cut within the wall. Avoid heavy handles, overly decorative patterns, and strong color contrast unless the wall is extremely simple.
For a contemporary luxury villa, combine stone, bronze metal, dark glass, and warm internal lighting. This style can support stronger contrast and more dramatic display, but the lines must remain clean. A wine cabinet beside a marble wall or dining feature wall can become one of the most photographed areas of the home.
For a classical or transitional villa, coordinate the wine cabinet with wall moldings, panel proportions, brass hardware, and warmer wood tones. Glass doors can still be modern, but frame profiles may be softer. The cabinet should feel elegant and permanent, not too industrial.
For a resort-style villa, use natural wood, travertine, rattan-inspired textures, bronze glass, and soft lighting. The cabinet should feel relaxed but still high-end. Avoid overly black or glossy finishes unless they are balanced by natural wall materials.
For an urban villa or luxury townhouse, space may be more limited, so wall integration becomes more important. A recessed cabinet, vertical wine display, or combined bar-and-wine wall can deliver strong impact without occupying too much floor area.
Why Customization Is Usually the Best Option for Villas
Standard wine cabinets are designed to fit common spaces. Villas are not common spaces. The wall sizes, ceiling heights, finishes, and lifestyle requirements vary widely. A custom wine cabinet allows the cabinet to match the actual architecture, rather than forcing the architecture to accept a standard product.
Customization also gives designers more control over finish coordination. The cabinet can use matching veneer, custom metal color, special glass tint, hidden handles, integrated lighting, adjustable storage, display shelves, and dimensions that align with wall panels. For developers and contractors, customization can also help maintain consistency across multiple villas or model homes.
From a marketing and resale perspective, a custom wine cabinet can become a memorable selling point. Buyers of luxury villas notice details that feel built-in and lifestyle-oriented. A coordinated wine wall suggests entertaining, collecting, hospitality, and refined living. It gives the property emotional value as well as functional value.
For homeowners, the benefit is more personal. The cabinet can reflect the owner’s taste, collection size, entertaining habits, and preferred atmosphere. Some owners want a quiet wine storage wall beside the dining room. Others want a dramatic glass display for a private lounge. A custom solution can support both.
Final Thoughts: Make the Wall and Cabinet Look Designed Together
The best way to coordinate a wine cabinet with villa walls is to stop thinking of the cabinet as a separate object. Think of it as part of the wall architecture. Its height, depth, material, frame, lighting, glass, and storage layout should all respond to the surrounding wall and the lifestyle of the villa.
A successful wine cabinet does not need to be the loudest feature in the room. It needs to feel inevitable, as if the wall was always designed to hold it. Whether the final design is seamless and quiet or dramatic and display-focused, the cabinet should improve the entire room composition.
If you are planning a villa dining room, private lounge, wine room, entrance display, or entertainment area, prepare your wall dimensions, interior renderings, preferred style, and bottle capacity. A professional custom wine cabinet supplier can help you choose the right structure, finish, lighting, and installation method for your project.
For a more accurate proposal, send your villa wall drawings or photos and describe the effect you want: integrated, framed, or focal-point. With the right coordination, a wine cabinet can become more than storage. It can become one of the most distinctive luxury features of the villa.
FAQ: Coordinating Wine Cabinets With Villa Walls
What is the best way to coordinate a wine cabinet with villa walls?
The best way is to design the cabinet together with the wall elevation. Match the cabinet scale, depth, material, color undertone, lighting, and frame details with the surrounding wall panels, stone, wood, doors, and ceiling lines.
Should a villa wine cabinet match the wall color?
Not always. Matching creates a seamless look, while contrast creates a focal point. The best option depends on whether the cabinet should blend into the wall or become a feature display. Even when the colors contrast, the cabinet should repeat at least one material or tone from the room.
What wall materials work well with a luxury wine cabinet?
Marble, travertine, walnut veneer, oak veneer, painted panels, microcement, decorative plaster, leather panels, and metal trims can all work well. The cabinet materials should be selected to complement the wall texture and the overall villa style.
Is a built-in wine cabinet better than a freestanding one for villas?
For luxury villas, a built-in wine cabinet usually provides a more refined result because it can align with wall panels, ceiling details, and surrounding finishes. A freestanding cabinet can still work, but it needs careful placement and finish coordination.
What details should I send to get a custom wine cabinet quotation?
Send wall dimensions, room photos, interior drawings or renderings, preferred materials, bottle capacity, cooling requirements, installation method, project location, and target delivery time. These details help the supplier prepare a more accurate proposal.
Inquiry Call to Action
Planning a custom wine cabinet for a villa project? Send your wall elevation, room photos, preferred style, finish references, and target bottle capacity. A tailored proposal can help you coordinate the cabinet with the villa wall before production, reducing design revisions and installation risk.