
Table of Contents
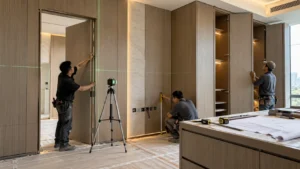
The doors have arrived, the wall panels are ready, and the cabinets are waiting for installation—but the floor level has changed, several electrical outlets no longer match the shop drawings, and the site team is debating which trade should go first. On integrated interior projects, installation problems rarely come from one product alone. They usually appear where doors, walls, cabinets, ceilings, flooring, stone, and MEP systems meet.
Successful door wall cabinet installation starts with approved shop drawings, verified site dimensions, confirmed floor and ceiling levels, common setting-out references, coordinated MEP interfaces, and a project-specific installation sequence. Door frames, wall panel joints, cabinets, stone, lighting, and finished surfaces must be checked as one system. There is no universal rule that doors, panels, or cabinets must always be installed first—the correct sequence depends on the project’s construction details and interfaces.
How to Coordinate Door, Wall and Cabinet Installation?
The most reliable approach is to coordinate the project in stages rather than treating doors, wall panels, and cabinetry as separate trades.
Before installation begins, the project team should know three things:
- Which drawing revision controls the work.
- Which site conditions are final enough to measure and install against.
- Which component creates the reference for the next trade.
A typical coordination process may look like this:
| Installation Stage | Main Check | Typical Responsible Party | Risk If Missed |
| Drawing approval | Latest approved shop drawings | Designer / GC / Fit-out team | Installation from outdated information |
| Site readiness | Floors, walls, ceilings, wet work | GC / Site team | Rework and damaged finishes |
| Field measurement | Actual openings and dimensions | Joinery / Millwork team | Components do not fit |
| Setting-out | Datum, levels, centerlines | GC / Installer | Misalignment between trades |
| MEP verification | Outlets, lighting, HVAC, plumbing | MEP + Joinery teams | Site cutting and service conflicts |
| Door frame coordination | Frame position and wall build-up | Door / Joinery team | Door and panel planes do not align |
| Cabinet positioning | Overall sizes and interfaces | Cabinet / Joinery team | Gaps, fillers, ceiling conflicts |
| Wall panel setting-out | Panel modules and joint positions | Wall panel installer | Joints conflict with doors or cabinets |
| Finish alignment | Grain, color, shadow gaps | Designer / Installer | Visible design inconsistency |
| Installation | Approved sequence | Trade contractors | One trade blocks another |
| Protection | Finished surfaces | GC / All trades | Scratches and impact damage |
| Final inspection | Function, alignment, finish | GC / Consultant / Installer | Unresolved punch-list items |
The exact responsibility depends on the contract and project structure, but the information must be coordinated before work proceeds.
What Must Be Ready Before Installation Starts?
Custom joinery should not be installed simply because the materials have arrived. The site must first be ready to receive them.
At minimum, contractors should verify:
- Approved shop drawings are available.
- The drawing revision is correct.
- Finished floor level is established.
- Wall positions are complete.
- Walls are sufficiently flat for the approved system.
- Ceiling heights and bulkheads are confirmed.
- Major wet work is complete where relevant.
- Stone interfaces are defined.
- MEP rough-ins are coordinated.
- Electrical outlet positions are confirmed.
- HVAC grille and thermostat locations are confirmed.
- Plumbing points are confirmed where cabinets are affected.
- Access panels are coordinated.
- Final dimensions are available where required.
- Storage areas are dry and protected.
- Delivery routes are clear.
A full-height wardrobe manufactured for a 2,700 mm ceiling condition can become a site problem if the final ceiling drops lower than expected. The same applies to wall panels installed before stone thickness is confirmed, or invisible doors installed before the adjacent wall build-up is complete.
Early installation does not always save time. In many cases, it simply moves the problem to a later stage.
What Should Be Verified From Shop Drawings?
Approved shop drawings should be the main installation reference for custom door, wall, and cabinet work. Architectural drawings and renderings communicate design intent, but they may not contain enough detail for installation.
Before starting, check:
- Overall dimensions
- Room numbers
- Component codes
- Door swings
- Door frame details
- Wall thickness
- Wall panel modules
- Cabinet widths and heights
- Grain direction
- Finish codes
- Shadow gaps
- Skirting details
- Ceiling transitions
- Stone interfaces
- Electrical outlets
- LED lighting
- HVAC locations
- Access panels
- Hardware
- Fixing details
- Installation clearances
A common site problem occurs when one trade installs from an architectural elevation while another installs from a later shop drawing revision. The individual components may each look correct, but their interfaces no longer align.
Revision control is therefore part of installation coordination—not just document administration.
When Should Final Site Measurements Be Taken?
Final field measurements should be taken when the relevant site conditions are stable enough to represent the actual installation environment. The correct timing depends on the component.
Important conditions may include:
- Finished wall positions
- Floor buildup
- Finished floor level
- Ceiling height
- Stone thickness
- Skirting dimensions
- Structural columns
- Service locations
- Door openings
Project teams should distinguish between three types of dimensions.
Design Dimensions
These come from architectural or interior design drawings and describe the intended space.
Site Dimensions
These are measurements taken from the actual construction.
Production Dimensions
These are the final dimensions used to manufacture the component.
These three numbers are not always identical. If the site differs from the drawings, the discrepancy should be documented before production or installation.
For high-value custom components, installers should not simply trim or modify products on site without approval.

What Installation Sequence Should Contractors Follow?
There is no single installation sequence that works for every door-wall-cabinet project. The correct sequence depends on which components control alignment and which items require earlier access.
A practical example may be:
Site verification → datum and finished level confirmation → concealed services coordination → fixing or subframe preparation → selected door frame installation → fixed cabinetry where required → wall panel setting-out → coordinated panel and joinery installation → adjustable doors and cabinet fronts → trims and finishing pieces → hardware adjustment → protection → final inspection and snagging
This sequence may change. For example, some built-in cabinetry may need to be installed before adjacent panels so the wall panel modules can terminate precisely against the cabinet. In another design, full wall cladding may be installed first and cabinetry fixed in front of it.
The sequence should therefore be determined from the approved detail rather than from habit.
Should Doors Be Installed Before Wall Panels?
Sometimes—but not always. The key question is whether the door frame establishes the alignment of the finished wall.
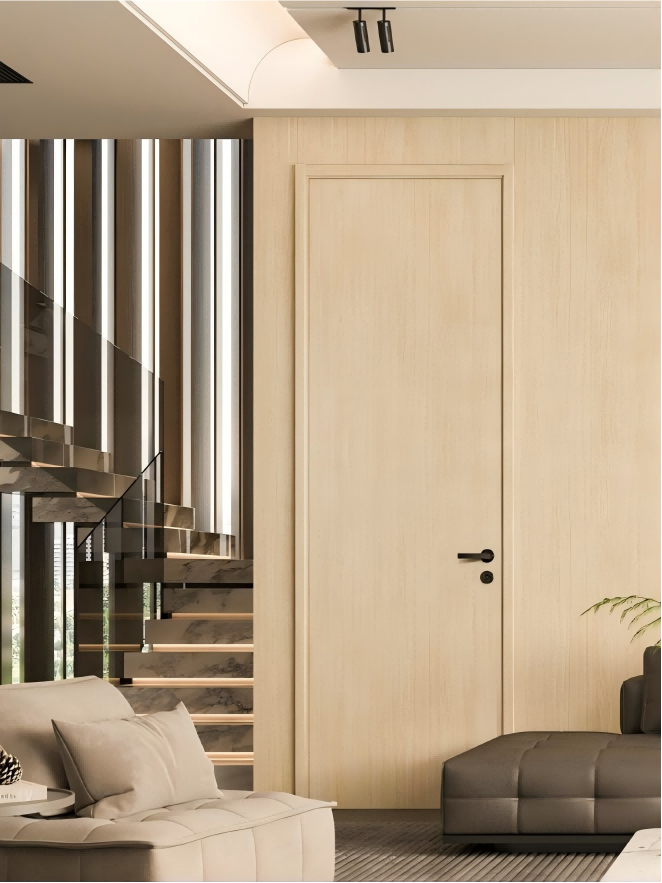
For a concealed-frame or invisible door, the frame may need to be installed or coordinated before decorative wall panels so the final surfaces can align to the same plane. The door leaf, however, may be installed later to reduce the risk of damage during heavy site work.
For a conventional door with visible trim, wall panels may terminate against the completed frame. For a concealed door, the panel joint positions, frame, leaf thickness, shadow gap, hinges, skirting, and ceiling line may need to be designed as one elevation.
[Internal link opportunity: invisible door designs]
The decision should be based on the door detail and wall build-up, not on a universal “doors first” rule.
Should Cabinets Be Installed Before Wall Panels?
Again, it depends on the detail. Built-in cabinets often define the edge of adjacent wall panels.
A full-height wardrobe, TV cabinet, vanity, wine cabinet, or flush storage wall may need to be positioned first so the panel modules can be adjusted to the actual cabinet edge. In other projects, the decorative wall surface is continuous and cabinetry is installed in front of it.
Important questions include:
- Is the cabinet flush with the wall panels?
- Does the panel finish continue onto the cabinet front?
- Is a shadow gap required?
- Is a filler panel allowed?
- Is the cabinet full height?
- Does the cabinet connect to a stone surface?
- Is the wall panel removable?
- Does the cabinet need independent fixing?
The correct sequence becomes clear only when these interfaces are defined.
How Do You Align Invisible Doors With Wall Panels?
An invisible door should be treated as part of the wall elevation, not as an isolated door opening.
The site team should coordinate:
- Door frame position
- Door leaf thickness
- Panel module layout
- Joint locations
- Flush plane
- Grain direction
- Shadow gaps
- Concealed hinges
- Opening clearances
- Adjacent panel thickness
- Skirting continuity
- Ceiling lines
If wall panels are set out independently of the door, visible joint misalignment can result.
For wood-look finishes, grain direction adds another layer of coordination. A design may require visual continuity from one wall panel across the door leaf and onto the adjacent panel. That continuity has to be considered during detailing, production, labeling, and installation.
How Do You Coordinate Cabinets With Floors and Ceilings?
Cabinet dimensions should be reviewed against actual floor and ceiling conditions before final installation.
Important items include:
- Finished floor level
- Flooring thickness
- Plinth height
- Toe-kick detail
- Cabinet leveling allowance
- Full-height cabinet dimension
- Ceiling drops
- Bulkheads
- Shadow gaps
- Filler panels
- Scribing requirements
A cabinet manufactured from structural slab dimensions may not fit correctly after flooring is installed. Similarly, a wardrobe produced before ceiling drops are finalized may require unnecessary site cutting.
Full-height cabinets require particular care because small changes in floor or ceiling level become visible immediately. When a continuous shadow gap is specified above cabinetry, the gap should be established from a common reference line—not adjusted independently cabinet by cabinet.
How Do You Coordinate Joinery With MEP?
MEP coordination should happen before decorative finishes close access to services.
Joinery may interact with:
- Electrical sockets
- Switches
- Data outlets
- LED drivers
- Integrated lighting
- HVAC grilles
- Thermostats
- Plumbing
- Drainage
- Access panels
- Fire-related devices shown in project drawings
A socket that appears only slightly out of position can fall directly behind a cabinet partition. An HVAC grille may conflict with a wall panel joint. A LED driver may become inaccessible after a feature wall is installed. A vanity plumbing point may not align with the internal cabinet layout.
These issues often lead to site cutting, finish damage, delays, and disputes between trades.
The preferred process is simple: compare approved joinery/shop drawings with coordinated MEP drawings before installation begins. Where conflicts exist, resolve them on paper before resolving them on finished material.
How Do You Coordinate Joinery With Stone?
Stone and joinery frequently meet at vanities, kitchens, TV walls, door surrounds, skirting, bars, and decorative features.
Before either trade begins, confirm:
- Stone thickness
- Finished edge position
- Joint location
- Overhang
- Support requirements
- Finished height
- Interface gap
- Installation sequence
- Final measurement responsibility
A small change in stone thickness can affect cabinet depth, panel termination, or the final position of adjacent finishes.
Responsibility should also be clear. Who measures first? Who provides the substrate? Who leaves the final joint? Who installs the sealant? Who adjusts if the wall is not square? Unclear answers often become site disputes.
How Do You Set Out a Door-Wall-Cabinet System?
Integrated interiors should be set out from common reference lines.
Typical reference points include:
- Finished floor level
- Horizontal datum
- Vertical datum
- Room centerline
- Door opening centerline
- Cabinet starting point
- Wall panel module lines
- Finished ceiling level
The problem with independent setting-out is cumulative error. A door installer may measure from one wall. The cabinet installer may measure from the opposite wall. The wall panel installer may divide the remaining space into equal modules.
Each method can be reasonable on its own, yet the completed elevation may look misaligned. Where visual continuity is important, key components should share the same datum and elevation references.
What Tolerances Matter During Installation?
Installation quality depends on controlling several tolerance categories.
- Wall flatness
- Floor level
- Vertical alignment
- Horizontal alignment
- Panel joint consistency
- Cabinet door alignment
- Flushness between surfaces
- Door clearances
- Shadow gaps
- Ceiling transitions
There is no universal numerical tolerance that should be applied to every project. Acceptable values should follow approved shop drawings, project specifications, manufacturer requirements, and applicable project standards.
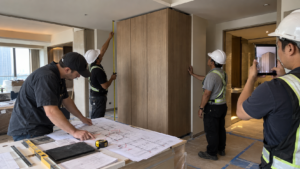
What matters operationally is that tolerances are identified before installation—not argued about after completion. If the design requires a narrow shadow gap, the site conditions and fixing method must be capable of achieving it. If the existing wall cannot support the required finish, the project team may need to correct or build out the substrate before decorative work begins.
What If Site Dimensions Do Not Match the Drawings?
Do not force the component to fit. Use a controlled discrepancy process:
Stop the affected work → record the discrepancy → measure the actual condition → take photographs → mark the location on the drawing → notify the responsible project team → assess the impact → issue clarification or revised information → approve the corrective action → continue installation
This protects both the finished material and the project record.
For example, if a full-height cabinet is 20 mm too tall because the ceiling has changed, cutting the cabinet immediately may create a new problem with finish edges, hardware, lighting, or adjacent panels. The solution should be reviewed as part of the system.
How Can Contractors Reduce Joinery Rework?
Most rework can be reduced before installation begins. The strongest controls include:
Use One Controlled Drawing Revision
Site teams should know exactly which revision is approved for installation.
Verify Site Conditions Before Production
Critical dimensions should be confirmed before custom components become difficult to change.
Hold Coordination Meetings Early
Joinery, MEP, stone, flooring, ceiling, and door interfaces should be reviewed together.
Use Mock-Ups
A mock-up can expose issues with joints, alignment, hardware, lighting, finishes, and installation sequence before the same mistake is repeated across multiple rooms.
Label Components Clearly
Room, floor, villa, elevation, and component codes help installers identify parts quickly.
Confirm Installation Sequence
A written sequence reduces situations where one trade blocks access needed by another.
Protect Finished Work
Completed joinery should not become an unprotected working surface for following trades.
Define Responsibility
Scope boundaries should identify who measures, fixes, adjusts, seals, protects, and signs off each interface.
| Project Coordination Note: If your door, wall panel, and cabinetry packages need to align as one interior system, reviewing these interfaces before production can prevent many site conflicts. Project teams can share the latest floor plans, elevations, and shop drawings for an initial coordination review. |
How Should Materials Be Delivered and Staged?
Site logistics should follow the installation plan. For larger projects, packaging may be organized:
- Room by room
- Floor by floor
- Villa by villa
- Unit by unit
- By installation zone
Each package should use clear component codes that correspond to drawings or installation schedules. This reduces unnecessary unpacking and prevents installers from searching through multiple crates for one panel or cabinet part.
Storage conditions also matter. Finished doors, panels, cabinet fronts, glass, and hardware should be stored in protected areas away from impact, moisture, dust, and active heavy construction where practical.
A good installation sequence can still fail if components arrive in the wrong order. Logistics and installation coordination are therefore part of the same workflow.
How Should Finished Joinery Be Protected?
Finished joinery may remain exposed while other trades continue working. Protection should therefore be planned, not improvised.
Particular attention should be given to:
- Door leaves
- Door edges
- Cabinet fronts
- Wall panels
- Corners
- Handles and hardware
- Glass
- High-gloss or decorative surfaces
Protection methods should avoid damaging the finish they are intended to protect. The project team should also clarify responsibility for maintaining protection after handover between trades.
A cabinet installer may protect the unit immediately after completion, but the protection can later be removed by another trade. Without clear site rules, responsibility becomes difficult to trace.
What Should Be Checked During Installation QC?
Installation quality control should be progressive. Do not wait until final handover to discover that the same alignment problem has been repeated in 40 rooms.
Typical checks include:
- Correct room or unit
- Correct component code
- Correct finish
- Correct drawing revision
- Overall dimensions
- Level
- Plumb
- Flushness
- Joint consistency
- Door operation
- Door clearance
- Cabinet front alignment
- Drawer operation
- Hardware function
- Grain direction
- Surface condition
- MEP interface
- Stone interface
- Ceiling interface
- Protection
For repetitive projects, inspect the first completed room or area carefully before continuing mass installation.
How Should a Punch List or Snag List Be Managed?
North American projects may call it a punch list. Middle East projects commonly use the term snag list. The purpose is the same: document incomplete or defective work in a way that can be tracked to closure.
Each item should ideally include:
- Room or location
- Component code
- Issue description
- Photograph
- Responsible party
- Priority
- Required corrective action
- Completion status
- Reinspection status
Avoid vague entries such as “Cabinet bad.” A more useful item is: “Room 508, wardrobe W02: left door 4 mm lower than right door; adjust hinges and recheck alignment.” Specific information speeds corrective work.
North American Projects: What Should Contractors Check?
For US and Canadian architectural millwork projects, coordination should focus on the approved project documents and actual field conditions.
General contractors and millwork contractors should verify:
- Latest shop drawing revision
- Field dimensions
- Millwork scope
- Finished floor conditions
- Ceiling interfaces
- MEP locations
- Hardware requirements
- Installation responsibilities
- Packaging and room identification
- Finished-work protection
- Punch-list process
If the project includes specific compliance, performance, or documentation requirements, these should be taken from the approved project specifications rather than assumed.
Imported millwork also benefits from clear site labeling. If each crate and component references the building, floor, room, and item code, installation teams can reduce handling and sorting time.
Middle East Projects: What Should Fit-Out Teams Check?
For UAE, Saudi Arabia, Qatar, Kuwait, and other GCC fit-out projects, joinery installation often sits within a formal consultant and approval workflow.
Before installation, check:
- Approved shop drawings
- Latest consultant comments
- Material approvals
- Finish approvals
- Approved mock-up
- BOQ and scope alignment
- MEP coordination
- Stone interfaces
- Ceiling interfaces
- Villa or room coding
- Installation inspection requirements
- Snagging process
Do not assume that an approved material sample automatically means every installation detail is approved. The project team should confirm that the final shop drawings reflect the latest architectural, consultant, and site information.

Door-Wall-Cabinet Installation Checklist
Before Installation
- Confirm latest approved shop drawings.
- Check drawing revision.
- Verify room and component codes.
- Confirm site dimensions.
- Check finished floor level.
- Check ceiling height and bulkheads.
- Verify wall flatness.
- Confirm stone conditions.
- Review MEP interfaces.
- Check door openings.
- Confirm material and finish codes.
- Review grain direction.
- Confirm fixing method.
- Establish datum lines.
- Confirm installation sequence.
- Inspect delivered materials.
- Confirm storage and protection areas.
During Installation
- Install from common reference lines.
- Check level and plumb progressively.
- Confirm door frame alignment.
- Verify cabinet positioning before final fixing.
- Check wall panel module positions.
- Confirm invisible door joint alignment.
- Check grain direction before fixing.
- Verify electrical and HVAC cutouts.
- Check stone interfaces.
- Protect completed surfaces.
- Record site discrepancies.
- Do not make unauthorized modifications.
- Inspect the first completed room or typical area.
After Installation
- Test doors.
- Test drawers.
- Check hinges and hardware.
- Check panel joints.
- Check cabinet front alignment.
- Inspect flushness.
- Inspect shadow gaps.
- Check grain continuity.
- Inspect surfaces for damage.
- Confirm MEP access.
- Complete punch list or snag list.
- Correct identified issues.
- Maintain protection until required handover stage.
FAQ
What should be installed first, doors or wall panels?
There is no universal rule. Concealed door frames may need to be installed or coordinated before wall panels because they establish the finished wall plane. Door leaves can often be fitted later to reduce damage risk. The correct sequence should follow the approved door and wall panel details.
Should cabinets be installed before wall panels?
Sometimes. Built-in cabinets may need to be positioned first when wall panels terminate against them or when both must create one flush elevation. In other systems, panels are installed first and cabinets are fixed afterward. The shop drawings should define the intended interface.
When should final site measurements be taken?
Final field measurements should be taken when relevant site conditions—such as wall positions, floor buildup, ceilings, stone, and service locations—are stable enough to represent the actual installation. Critical custom components should not rely only on early design dimensions when field conditions control the final fit.
How do you align invisible doors with wall panels?
Coordinate the door frame, leaf thickness, wall panel modules, panel joints, shadow gaps, grain direction, skirting, and ceiling lines from one approved elevation. An invisible door should be treated as part of the wall system rather than installed independently.
What if site dimensions differ from shop drawings?
Stop the affected work, record and measure the discrepancy, photograph the condition, mark the relevant drawing, and notify the responsible project team. The impact should be reviewed before components are modified. Approved clarification or revised information should guide the corrective action.
How do you coordinate joinery with MEP?
Overlay joinery requirements with electrical, lighting, HVAC, plumbing, and access requirements before installation. Confirm outlets, drivers, grilles, pipes, thermostats, and access panels against the approved shop drawings. Resolving conflicts before finishing work begins reduces cutting and rework.
Who should check wall flatness before installation?
Responsibility depends on the project contract and trade scope. However, wall condition should be verified before decorative panels or fitted joinery are installed. If the substrate cannot achieve the approved finished alignment, the issue should be raised before installation rather than concealed with uncontrolled site adjustments.
How can contractors reduce joinery installation rework?
Use controlled drawing revisions, field verification, early interface coordination, mock-ups, room prototypes, clear component labeling, installation sequencing, and progressive QC. The first completed room or typical area should be inspected before repeating the same installation across a larger project.
What should be checked before custom joinery installation?
Check approved drawings, site dimensions, floor and ceiling levels, wall condition, MEP locations, stone interfaces, door openings, finish codes, grain direction, installation datum, access routes, storage conditions, and trade sequence. Any unresolved condition that affects fit or finish should be clarified before installation.
Final Project CTA
Planning a luxury villa, hotel, residential, or commercial fit-out project where doors, wall panels, and cabinetry need to align as one coordinated interior system?
Send your latest architectural drawings, interior elevations, shop drawings, and project scope to Melinco / ME Building Solution for an initial technical review.
The goal is not simply to determine which component should be installed first. It is to identify the interfaces that need to be confirmed before production and installation—door frames, wall panel modules, cabinetry dimensions, MEP points, stone, floor levels, ceilings, finishes, and site measurements.
Early coordination can give designers, general contractors, fit-out contractors, and project managers a clearer installation basis before custom components reach the site.