Table of Contents
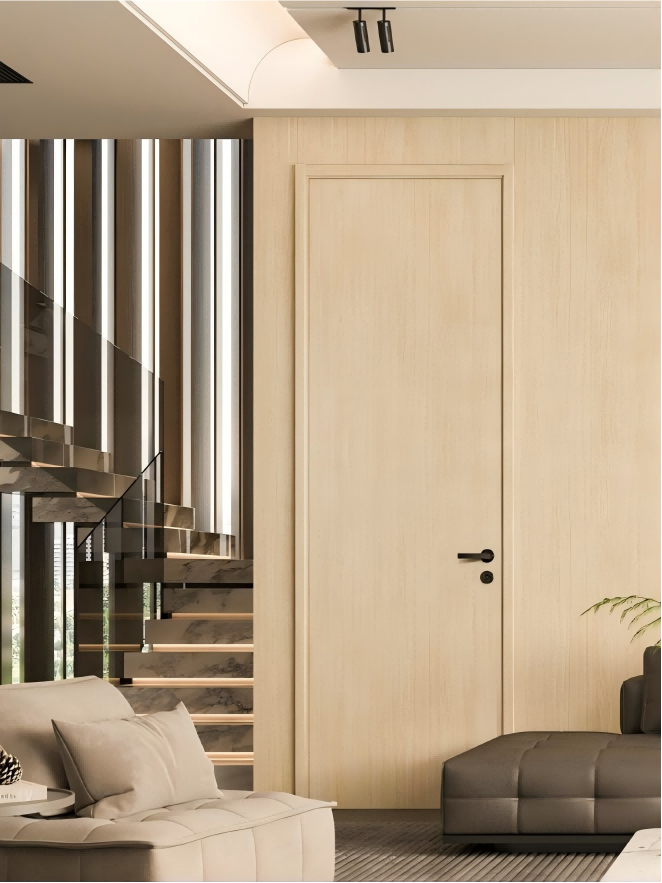
You have seen the photographs. Walls that flow without interruption from floor to ceiling — a room door that appears only when you need it, a wardrobe that reveals itself with a single gentle press. The images are stunning, and they should be. But here is what those photographs rarely show: whether the system behind them is truly integrated, or simply styled to look that way.
Because there is a significant difference between a wall that photographs as seamless and one that is engineered to be seamless. That gap shows up not in the showroom or on the mood board — it shows up in year three of daily use, in the millimetre-wide inconsistency that catches the morning light and announces itself to every client, guest, or resident who walks through the door. So what actually separates a door-wall-cabinet system that is truly integrated from one that merely appears to be? The answer is precise, technical, and more important than most buyers realise until it is too late to specify it correctly.
Quick Answer
What Makes a Door-Wall-Cabinet System Truly Integrated?
A door-wall-cabinet system is truly integrated when six defining criteria are met simultaneously: all components — room doors, cabinet doors, and decorative panels — occupy the same flush vertical plane with no surface protrusion or setback; all visible surfaces share a continuous, matched finish with no material transition at joints; all hardware is fully concealed, including hinges, latches, and closers; gaps between adjacent elements are uniform and precisely controlled to within ±0.5mm of the specified dimension (typically 1.5mm to 2.5mm); every door and cabinet operates with complete functional independence at a consistent performance level; and the structural frame anchors the entire system as one architectural unit rather than a collection of adjacent furniture pieces. When all six conditions are met together, the result is a wall that functions as architecture — not furniture arranged against one.
The Difference Between Integrated and ‘Integrated-Looking’
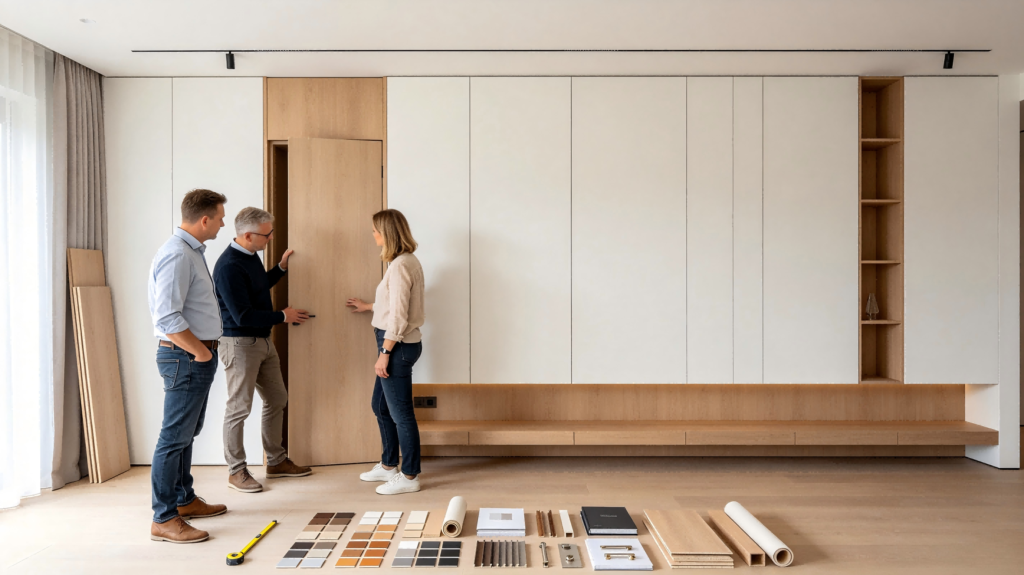
The word ‘integrated’ has become one of the most overused terms in interior specification. Walk through any trade show or scroll through any manufacturer’s catalogue and it appears everywhere — attached to products that, on closer inspection, are simply freestanding units pushed together, standard doors installed beside standard wardrobes, or conventional furniture packages finished in coordinating colours.
True integration is not a styling choice. It is a technical condition — one that can be defined precisely, measured objectively, and tested against engineering criteria that either pass or fail. A system is either truly integrated or it is not. Understanding the difference is essential for any designer, developer, or client who wants a result that holds up to scrutiny in the real world, not just in product photography.
This article defines what true integration means, how it is achieved through design and manufacturing discipline, how to identify it in a supplier’s completed work, and why the difference matters more than most buyers appreciate until they are already living with the consequences of specifying something that fell short.
The 7 Hallmarks of a Truly Integrated System
True integration is not achieved by any single design decision or any single product choice. It is the outcome of seven interdependent criteria being met simultaneously and maintained with precision. Remove any one of them, and the system crosses into the territory of ‘almost integrated’ — which, in practice, means not integrated at all.
Hallmark 1: The Single Plane Principle — Perfect Flush Alignment
The most fundamental requirement of a truly integrated door-wall-cabinet system is that all of its visible faces occupy the same vertical plane. The front face of the room door, the front face of every cabinet door, and the front face of every decorative fill panel must be flush with one another. Not nearly flush. Not close enough. Exactly flush.
This sounds straightforward. In practice, it is one of the most technically demanding requirements in interior joinery. Achieving a single continuous vertical plane across a wall that contains multiple independently opening elements — each mounted on its own hardware, each subject to its own tolerances and movement — requires precision at every stage of the process: design, manufacturing, and installation.
A system where one door protrudes 1mm beyond its neighbour is not integrated. A cabinet section that sits 1.5mm behind its surrounding panels is not integrated. These are not cosmetic imperfections — they are the visible symptoms of a system that was not engineered to integration standards. When a wall is truly flush and the light falls across its surface without catching any protrusion or shadow-gap between elements, it achieves the architectural quality that makes integrated systems compelling. Until then, it is simply furniture beside a door.
Hallmark 2: Unified Surface Finish — Visual Continuity Across Every Element
The second hallmark is complete visual continuity across the entire wall surface. In a truly integrated system, every component — room door, cabinet door, fill panel, and frame reveal — shares exactly the same surface treatment: the same material, the same finish specification, the same colour reference, the same texture, and the same light reflectance value.
This is more demanding than it sounds. Different substrates — the MDF of a cabinet door, the engineered core of a room door, the aluminium reveal of a frame profile — respond differently to the same paint or laminate. A truly integrated system accounts for this at the specification stage: the finish is applied to samples of every substrate in the system and assessed together under controlled lighting before manufacturing begins.
‘Coordinated’ is not sufficient. A room door in a slightly warmer white than the cabinet beside it is coordinated, not integrated. In a truly integrated system, the eye cannot detect any transition between adjacent elements, even under raking light at close range. The entire wall reads as a single material surface — because in every observable sense, it is.
Hallmark 3: Concealed Hardware — Nothing That Interrupts the Surface
Every piece of hardware on a door or cabinet is a potential intrusion into the integrated surface. Visible hinges, protruding handles, exposed strike plates, and surface-mounted closers each announce that this is furniture, not architecture. In a truly integrated system, all operational hardware is completely hidden from the exterior wall face.
This is achieved through a specific set of hardware choices, each selected for invisibility and commercial-grade performance:
◆ Concealed hinges: European-style cup hinges or specialised flush-frame hinge systems mounted entirely within the thickness of the door and frame profile. Completely invisible when closed, adjustable in three axes for precise alignment after installation.
◆ Push-to-open mechanisms: Touch-latch systems that spring a door open with a gentle push — no external handle required. The finest systems use hydraulic or magnetic touch-latch mechanisms that provide consistent activation force across thousands of cycles.
◆ Recessed flush pulls: Where a physical grip is necessary — typically for room entry doors — a flush pull machined into the door face provides the grip without any protrusion from the panel surface.
◆ Concealed door closers: Hydraulic closing mechanisms integrated within the door leaf or frame profile, never surface-mounted. Invisible from the exterior face of the wall.
◆ Soft-close dampers: Mechanisms that catch each door at the last 20mm of travel and draw it silently to a fully closed position, eliminating slamming and the hardware stress that comes with it.
When hardware is truly concealed and correctly specified, opening a door in an integrated wall feels effortless — like touching a surface and having it respond, rather than operating a mechanical system. That quality of experience is only possible when hardware is invisible to both the eye and the hand.
Hallmark 4: Precision Gap Control — The Discipline of the 2mm Rule
The gaps between adjacent elements in a door-wall-cabinet system are among the most revealing indicators of system quality. They are the spaces that cannot be hidden, cannot be corrected in post-production photography, and cannot be explained away by poor lighting. They are what the trained eye goes to first — and what tells an experienced specifier immediately whether a system was engineered or assembled.
In a truly integrated system, gaps between all adjacent elements are defined by three requirements:
◆ Uniform: Every gap across the entire wall — between door and cabinet, cabinet and panel, panel and floor — reads as exactly the same dimension. Not approximately. Exactly.
◆ Controlled: The gap dimension is specified on the technical drawing at the design stage (typically 1.5mm to 2.5mm for premium systems), and manufacturing and installation hold that tolerance to within ±0.5mm across the entire installation.
◆ Purposeful: In the finest systems, the gap is not merely a tolerance to manage — it is a design element. Its precise dimension is chosen to create a specific shadow-line effect that contributes to the wall’s architectural character.
A wall where gaps vary between elements — 1.5mm in one place, 3mm in another, 4.5mm around the door frame — is not integrated. It is assembled. The distinction is visible at a glance to any experienced designer or discerning client, and it persists for the life of the installation.
Hallmark 5: Structural Integrity — Built In, Not Placed Against
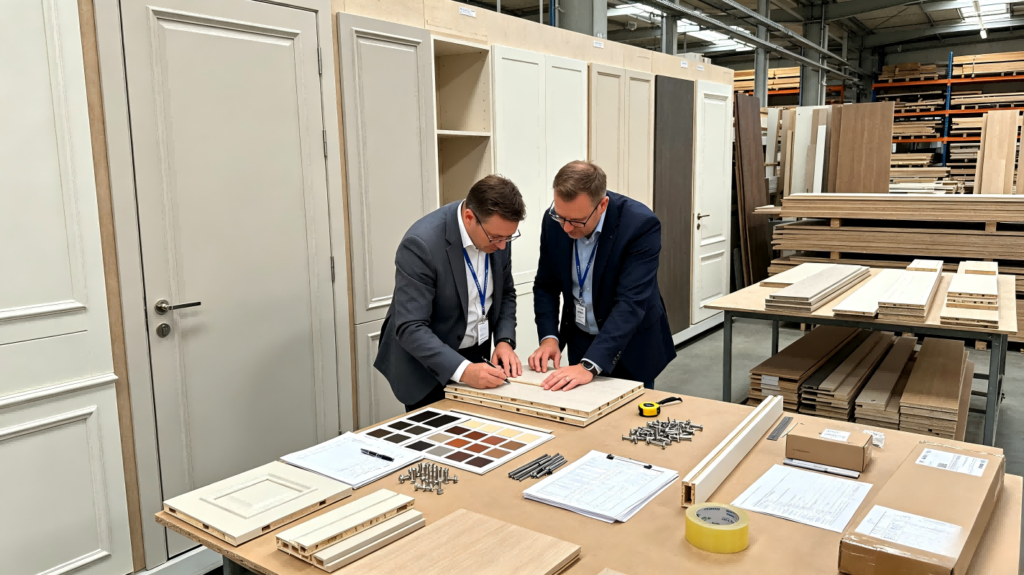
A truly integrated door-wall-cabinet system is anchored to the building’s structure as a single architectural element. It is not furniture placed against a wall. It is not cabinets pushed up to a door frame. It is a system whose structural frame — fabricated from precision steel or aluminium profiles — is anchored to the floor, ceiling, and where appropriate the adjacent walls, creating a fixed, plumb, and level datum against which all components are installed and aligned.
This structural approach is what separates a truly integrated system from a styled one. When the frame is solid and true, every door and cabinet mounted within it can be aligned with the precision the system requires. When the frame is absent — when cabinets are simply positioned next to a door, resting on the floor and leaning against the wall — no amount of careful installation will produce the flatness and alignment that integration demands.
The structural frame is also what gives the system its durability. Free-standing furniture moves. It shifts with seasonal humidity changes, floor settlement, and the accumulated vibration of daily use. A structurally integrated system anchored to the building does not move — and the alignment achieved on installation day is the alignment that endures.
Hallmark 6: Functional Independence — Every Element Performs Identically
A door-wall-cabinet system containing six door leaves must have six door leaves that each open and close perfectly, independently, and without affecting the operation of any neighbouring element. This is one of the most common failure points in systems that aspire to true integration but fall short.
When one door in a system is poorly hung or specified on hardware that is too light for its weight, it affects the perceived quality of every door in the wall. The hand compares instinctively: a soft, smooth, silent close on one door followed by a slightly firmer, slightly resistant close on the adjacent cabinet is sufficient to undermine the integrated effect — because integration communicates consistency, and inconsistency is its opposite.
True integration requires every element to perform to the same standard simultaneously:
◆ Every door opens with the same resistance from the same touch pressure
◆ Every soft-close mechanism decelerates at the same point in the door’s travel
◆ Every push-to-open mechanism activates reliably from the same light touch
◆ Every drawer glides on its runners with the same smooth, level, weightless movement
◆ Every aligned gap remains at its specified dimension regardless of how many times adjacent elements are opened and closed
This level of consistent performance requires hardware specified precisely to each door’s weight and frequency of use, installed by trained fitters who understand the engineering of the system, and adjusted to final specification after installation is complete.
Hallmark 7: Designed-In Technology — Light, Power, and Control Without Compromise
The most sophisticated expression of true integration goes beyond doors and storage to incorporate technology within the wall system itself — in a way that does not compromise the surface continuity that defines the system’s value.
In a truly integrated specification, LED lighting is not added after the fact — it is designed in. Recessed strip lighting within cabinet interiors activates on door-open. Ambient backlighting behind shadow-gap reveals creates depth and luminosity from sources that cannot be located by eye. Power outlets and USB charging points are integrated within panel recesses behind flush-mounted covers that sit at a designed position — not wherever the contractor found it most convenient. Smart control interfaces are inset into the panel surface behind glass or acrylic faces that become part of the wall’s visual composition.
When technology is integrated at this level of care from the outset of the design process, the door-wall-cabinet system becomes a complete architectural environment. When it is added retrospectively, it announces itself — and in doing so, it announces that the system was not truly integrated after all.
What ‘Almost Integrated’ Looks Like — And Why It Falls Short
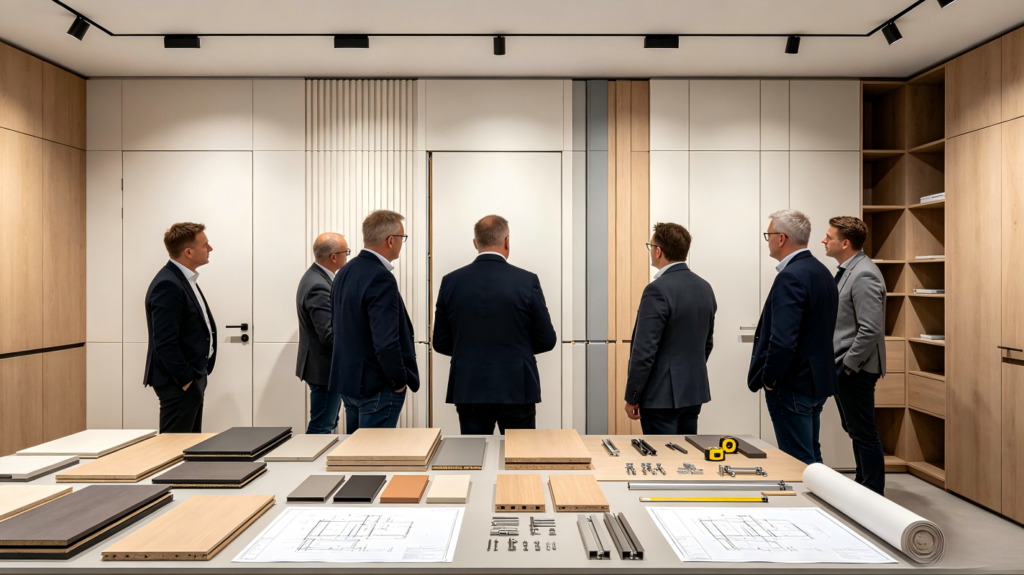
Understanding true integration requires understanding what falls short of it — because the gap between ‘almost integrated’ and ‘truly integrated’ is where most specification disappointments occur. These are the most common failure modes:
The Mismatched-Finish System
Cabinet doors in a slightly different shade or texture from the room door beside them. Immediately visible under raking light or close inspection. Cause: different substrate materials finished by different processes at different times, without cross-testing before manufacturing. Result: a wall that looks coordinated rather than unified — which is not the same thing.
The Visible-Frame System
A system where the structural frame reveals itself at the junction between elements — a visible aluminium edge, a timber reveal that does not match the panel finish. Cause: insufficient investment in concealed frame detailing and junction profiles. Result: the wall reads as a collection of elements, not as a single surface.
The Variable-Gap System
Gaps that are inconsistent across the wall, or that widen and narrow with the seasons as timber components respond to humidity variation. Cause: insufficient structural anchoring, over-reliance on timber substrates without moisture-resistant treatment, and tolerance management that is not controlled through the manufacturing process. Result: a wall that was flush on day one and visibly assembled by year two.
The Heavy-Hardware System
Hinges specified for kitchen cabinet doors applied to tall, solid-core room doors weighing three times the design load. Hardware that droops, creaks, or misaligns under its own weight within months. Cause: cost reduction in the hardware specification — the single most common failure point in systems that look integrated but perform like furniture. Result: a wall that feels as cheap as the hardware that holds it up.
The Afterthought-Technology System
Power outlets cut into panels after installation, with visible back-boxes and ill-fitting plastic covers. LED strips on surface-mounted tracks. Control panels screwed to the face of a cabinet. Cause: technology not incorporated into the design brief, specified retroactively by a different contractor. Result: the visual coherence of the integrated wall is broken by every visible fitting.
The Design and Engineering Process Behind True Integration
A truly integrated door-wall-cabinet system is the result of a rigorous design and engineering process. Each stage of that process has a specific purpose, and the omission of any stage introduces risk that typically manifests as a visible quality failure in the completed installation.
Stage 1 — Precise Site Survey and Tolerance Analysis
Before design begins, the installation site is surveyed to millimetre accuracy. Floor levels, wall verticals, ceiling heights, structural opening positions, and the location of all existing services are recorded and modelled. The survey identifies any existing conditions — an out-of-plumb wall, an uneven floor, a structural column — that will require specific detailing in the frame design.
Stage 2 — Technical Elevation Drawing at Scale
The full wall elevation is drawn at 1:20 or larger, showing every panel dimension, every door position, every gap specification, every frame reveal profile, and every hardware element. Gap dimensions are annotated. Frame reveal dimensions are detailed. Hardware types are selected in direct relation to door weight, opening frequency, and finish requirements. This drawing is the design contract between the client and the manufacturer: every visible element is defined before a single component is made.
Stage 3 — Cross-Substrate Finish Testing
Before manufacturing begins, the specified surface finish is applied to samples of every substrate in the system. Samples are assessed together under controlled lighting — including raking light at low angle — to verify that the finish reads identically across the room door core, the cabinet door blank, the fill panel board, and the frame profile. Any variance is resolved by adjusting the finish specification before production begins.
Stage 4 — CNC Manufacturing to Tolerance
All panel components are cut and profiled on CNC routing equipment to the tolerances specified in the technical drawing. The CNC process holds dimensional tolerances of ±0.5mm or better — a level of consistency that hand-cutting cannot reliably achieve. Components that are cut consistently produce gaps that are consistent. This is the manufacturing foundation on which the visual quality of the finished installation depends.
Stage 5 — Pre-Assembly and Factory Quality Check
Before components leave the factory, critical assemblies are pre-built at the bench: doors hung in their frames, gaps verified against the specification, hardware activated and assessed. Any component that falls outside tolerance is identified and remade at this stage — where the cost of correction is low — rather than on site, where it is disruptive and expensive.
Stage 6 — Trained-Fitter Installation
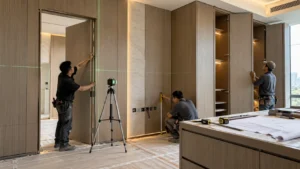
The final determinant of whether design and manufacturing precision is realised in the completed wall is the skill of the fitter. A truly integrated system requires fitters who understand its engineering — who can set a structural frame to within 1mm of plumb and level across a 4-metre span, hang a door and adjust it to a 2mm gap in every position, and tune soft-close mechanisms to the exact deceleration point specified for each door weight. Installation by general joiners unfamiliar with the system’s requirements is the most common cause of quality failure in systems that were correctly designed and manufactured.
Materials That Enable — or Prevent — True Integration
The choice of materials in a door-wall-cabinet system directly determines whether true integration is achievable. Certain material combinations are inherently more suitable for integration than others, and the wrong choice at the specification stage creates problems that no amount of installation skill can resolve.
Substrate Materials for Panel and Door Blanks
◆ Moisture-resistant MDF: The preferred substrate for painted and lacquered door and panel faces. Dimensionally stable, smooth to a very fine surface, and responsive to CNC machining. Standard (non-moisture-resistant) MDF is unsuitable for any application where humidity variation will occur.
◆ Engineered timber cores: Used for room entry doors that require fire-performance ratings or acoustic mass. Must be cross-tested with the specified finish against adjacent MDF panels before manufacturing, as colour response can differ materially between substrates.
◆ Aluminium composite panels: Used for applications requiring extreme flatness and dimensional stability, particularly in large-format fill panels where timber-based substrates would be susceptible to bow.
Frame Materials
◆ Precision steel profiles: The highest-rigidity option for structural frames, typically used in large-format or multi-wall installations where dimensional stability is critical. Welded, ground flat, and powder-coated to a true surface.
◆ Aluminium extrusions: The standard specification for most high-quality integrated systems. Available in toleranced profiles specifically designed for integrated wall applications, with concealed fixing and panel retention systems.
◆ Engineered timber frames: Appropriate for smaller installations or where a timber reveal is part of the aesthetic. Requires careful design of panel fixings to accommodate seasonal movement without transmitting stress to adjacent elements.
Surface Finishes
◆ Two-pack polyurethane lacquer: The most durable and colour-consistent painted finish for integrated systems. Applied in controlled spray conditions, catalysed for a hard, chemical-resistant surface. The only painted finish suitable for commercial-grade integrated applications.
◆ High-pressure laminate (HPL): Extremely durable, dimensionally stable, and available in an extensive range of solid colours, wood effects, and textured surfaces. Consistent colour across all substrate types — the easiest finish to control for large-scale integration projects.
◆ Real wood veneer over stable substrate: The premium natural material choice. Requires careful grain and colour matching across adjacent elements; applied over moisture-resistant substrate and sealed with compatible lacquer for durability.
Truly Integrated vs. Look-Alike Systems: A Visual Comparison
The table below summarises the key differences between a system that meets the criteria for true integration and one that approximates the look without achieving the engineering standard.
| Criterion | Truly Integrated | Look-Alike System |
| Plane alignment | Single flush plane, 0mm deviation | Visible protrusion / setback |
| Surface finish | Identical across all substrates | Near-match; visible under raking light |
| Hardware | 100% concealed, commercial-grade | Exposed hinges or visible handles |
| Gap control | Uniform ±0.5mm tolerance | Variable — widens over time |
| Structural frame | Anchored to building structure | Furniture placed against wall |
| Functional consistency | All elements perform identically | Variation across doors & drawers |
| Technology integration | Designed in from outset | Retrofitted — visible fittings |
| Lifecycle (yrs before refresh) | 10–15+ years | 4–6 years |
The performance differences in this table compound over time. A system that meets the true integration standard on installation day still meets it in year ten. A look-alike system begins to reveal its compromises within months — through gap variation, finish mismatch under different lighting conditions, and hardware that gradually loses the consistent performance that creates the integrated experience.
A Specifier’s Checklist: Questions That Reveal the Truth
When evaluating whether a supplier can genuinely deliver a truly integrated door-wall-cabinet system, the following questions separate manufacturers who engineer integration from those who style it. A supplier who designs and builds to true integration standards will welcome every one of these questions — because their answers are their most effective demonstration of capability.
❓ Can you show me a 1:20 elevation drawing of a previous project with gap dimensions annotated?
A supplier who designs to true integration standards produces technical drawings with every gap dimension specified before manufacturing begins. If the answer is ‘we don’t produce detailed drawings at that scale,’ the gap control in the finished installation will reflect that absence.
❓ What is your manufacturing tolerance for panel dimensions?
The answer should be ±0.5mm or better. Anything wider makes consistent 2mm gaps across a full-height wall statistically unreliable. Ask to see the CNC cutting data that demonstrates this tolerance.
❓ What hinge system do you specify for room entry doors, and what is its cycle rating at the door’s weight?
The answer should reference a named commercial hardware brand (Simonswerk, Tectus, FritsJurgens, Sugatsune, or equivalent) with a documented cycle rating. A supplier who cannot name the brand or quote a cycle rating has not specified hardware to a commercial standard.
❓ Can I visit a completed installation and view it under raking light?
Raking light — a light source held at a low angle to the wall surface — reveals any surface plane inconsistency, gap variation, or finish mismatch that straight-on lighting conceals. A supplier who is confident in their work will arrange this visit. A supplier who declines or redirects to photography is telling you something important.
❓ Do you pre-assemble and test components at the factory before delivery to site?
Pre-assembly testing catches tolerance deviations before they become on-site corrections. A supplier who ships components directly from cutting to site is outsourcing their quality control to the installation team.
❓ Who carries out the installation — your own trained fitters or subcontracted joiners?
The answer matters significantly. True integration requires fitters who understand the engineering of the specific system they are installing, not general joiners installing it for the first time. Ask how fitters are trained and how their work is inspected.
Frequently Asked Questions
Can true integration be achieved in a renovation project as well as a new build?
Yes — true integration in a retrofit context begins with an accurate survey of the existing conditions. The structural frame is designed to bring a new, plumb, and level datum to the installation, accommodating any irregularities in the existing wall surface. The result is indistinguishable from a new-build integrated installation. The critical difference is that the survey must be conducted with precision before design begins.
Does a truly integrated system cost significantly more than a standard specification?
Yes — there is typically a cost premium of 20 to 40 percent over a standard door-and-wardrobe specification, depending on scale and material selection. This premium funds the engineering precision, commercial-grade hardware, controlled manufacturing process, and specialist installation that true integration requires. Over a 10-year lifecycle, the premium is typically recovered through lower maintenance costs, extended refurbishment intervals, and the measurable quality impact on the space and those who use it.
How do you maintain a truly integrated system’s alignment over time?
Commercial-grade concealed hinges are adjustable in three axes using a standard Allen key. If door alignment shifts marginally after building settlement or extended use, adjustment takes two minutes per door and restores the gap to its original specification without any specialist intervention or visible disruption to the wall surface.
Can a truly integrated system incorporate fire door compliance?
Yes. Room entry doors within an integrated system can be specified with fire-rated door cores, intumescent seal strips, and compliant hardware to achieve FD30 or FD60 certification without compromising the flush aesthetic. Fire performance compliance must be designed in from the outset, confirmed with the relevant test certifications, and documented in the manufacturing specification.
What is the minimum room or wall size that warrants a truly integrated system?
There is no meaningful minimum. True integration is specified in rooms of all sizes, from compact hotel guestrooms and studio apartments to large residential open-plan spaces and commercial environments. In smaller spaces, the removal of visual noise from the wall surface is arguably even more impactful — the room reads as larger, calmer, and more considered than its actual dimensions would suggest.
How long does the full process take from initial brief to completed installation?
For a typical single-wall residential project, the process runs approximately 8 to 12 weeks: 1 to 2 weeks for site survey and design development; 1 week for design approval and finish confirmation; 5 to 8 weeks for precision manufacturing; and 1 to 3 days for installation and adjustment on site. Larger commercial or hospitality projects require a longer programme, established in detail at the project outset.
Can individual elements be replaced or updated without disturbing the rest of the system?
Yes — this is one of the practical advantages of a structurally integrated system over freestanding furniture. Individual door fronts, panel surfaces, and cabinet modules can be replaced without disturbing the structural frame or adjacent elements. A surface finish refresh can extend the visual life of the system by years without the cost or disruption of a full refurbishment.
Specify With Confidence — Bring True Integration to Your Project
True integration is not a premium finish option or a luxury upgrade. It is a standard of engineering — one that is either met or not met, and whose presence or absence announces itself in every room that contains it.
If you are designing or developing a space where the quality of finish is consequential — where a door-wall-cabinet system is expected to define the room rather than furnish it — the starting point is a conversation with a supplier who can demonstrate every one of the seven criteria outlined in this article, not simply describe them.
We design, manufacture, and install truly integrated door-wall-cabinet systems for residential, commercial, and hospitality projects at every scale. Our process is built around the engineering standards this article defines: precise survey and technical design, CNC manufacturing to documented tolerances, cross-substrate finish testing, pre-assembly quality verification, and installation by trained specialist fitters.