Table of Contents
Transform your living room from ordinary to extraordinary with the strategic use of wall trim. This comprehensive guide reveals how architectural molding and decorative trim can elevate your space, add timeless elegance, and create a designer look that dramatically increases your home’s visual appeal and market value.
Introduction: The Transformative Power of Wall Trim
Wall trim represents one of interior design’s most powerful yet underutilized tools for creating stunning living spaces. These architectural details—ranging from simple baseboards to elaborate crown molding—add dimension, character, and sophistication that flat walls simply cannot achieve. When thoughtfully applied, wall trim transforms generic living rooms into spaces with distinct personality, architectural interest, and professional polish.
The beauty of wall trim lies in its versatility. Whether your aesthetic leans toward traditional elegance, modern minimalism, farmhouse charm, or contemporary sophistication, appropriate trim selections can reinforce and enhance your chosen style. Wall trim creates visual boundaries that define spaces, draws eyes toward architectural features, conceals imperfections and transitions, adds perceived value to your home, and provides opportunities for creative color applications and design expression.
This comprehensive guide explores how to strategically use wall trim in your living room, examining different trim types and their applications, design strategies for various styles and room sizes, material selection and quality considerations, installation approaches from DIY to professional, and budget-friendly options alongside premium choices. Whether you’re planning a complete living room renovation or seeking simple updates with maximum impact, you’ll discover how wall trim can transform your space into the beautiful, stylish room you’ve always envisioned.
Understanding Wall Trim: Types and Terminology
Essential Wall Trim Components
Successful wall trim applications require understanding different trim types and their specific functions.
Crown Molding: Crown molding—the decorative trim installed where walls meet ceilings—represents the most impactful wall trim addition for living rooms.
Design Impact:
- Creates elegant transition between walls and ceilings
- Draws eyes upward, emphasizing ceiling height
- Adds architectural grandeur and sophistication
- Available in profiles ranging from simple to ornate
- Traditionally associated with formal, high-end interiors
Style Variations:
- Simple cove molding for understated elegance
- Elaborate multi-piece crown for traditional luxury
- Modern angular profiles for contemporary spaces
- Craftsman-style crown with clean, substantial lines
Baseboards (Base Molding): Baseboards run along wall bottoms where walls meet floors, providing both decorative and protective functions.
Practical Benefits:
- Protects walls from vacuum cleaners, furniture, and foot traffic
- Conceals gaps between walls and flooring
- Creates visual foundation anchoring room design
- Adds finished, polished appearance
Height and Style Options:
- Standard baseboards: 3-5 inches tall
- Tall baseboards: 6-8 inches for dramatic impact
- Colonial style: simple, elegant profiles
- Victorian style: ornate, detailed designs
- Modern style: clean, minimal profiles
Chair Rail Molding: Chair rail—horizontal trim typically installed 32-36 inches from the floor—divides walls into upper and lower sections.
Design Functions:
- Originally protected walls from chair backs
- Creates visual interest breaking up tall walls
- Enables two-tone paint treatments
- Adds traditional architectural character
- Works particularly well in formal living and dining rooms
Picture Rail Molding: Picture rail molding, installed near ceiling height, traditionally allowed artwork hanging without wall damage.
Contemporary Applications:
- Creates visual interest in upper wall areas
- Adds period character to traditional homes
- Enables artwork display using special hooks
- Provides decorative detail in high-ceiling rooms
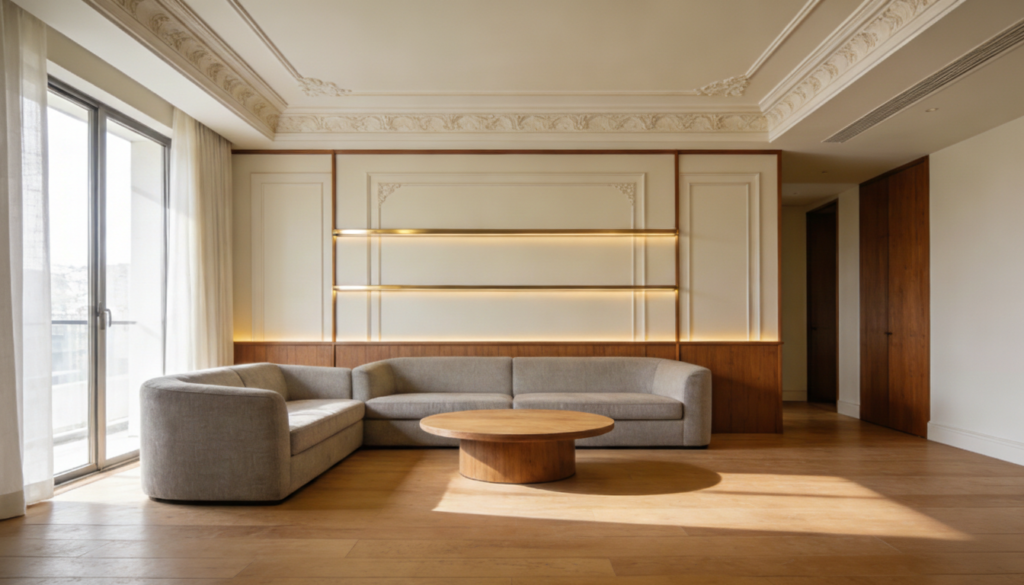
Panel Molding (Picture Frame Molding): Panel molding creates decorative rectangular frames on walls, adding dimensional architectural interest.
Design Impact:
- Creates sophisticated wainscoting effects
- Adds three-dimensional wall texture
- Provides framework for accent colors or wallpaper
- Delivers high-end architectural detail
- Works beautifully in traditional and transitional living rooms
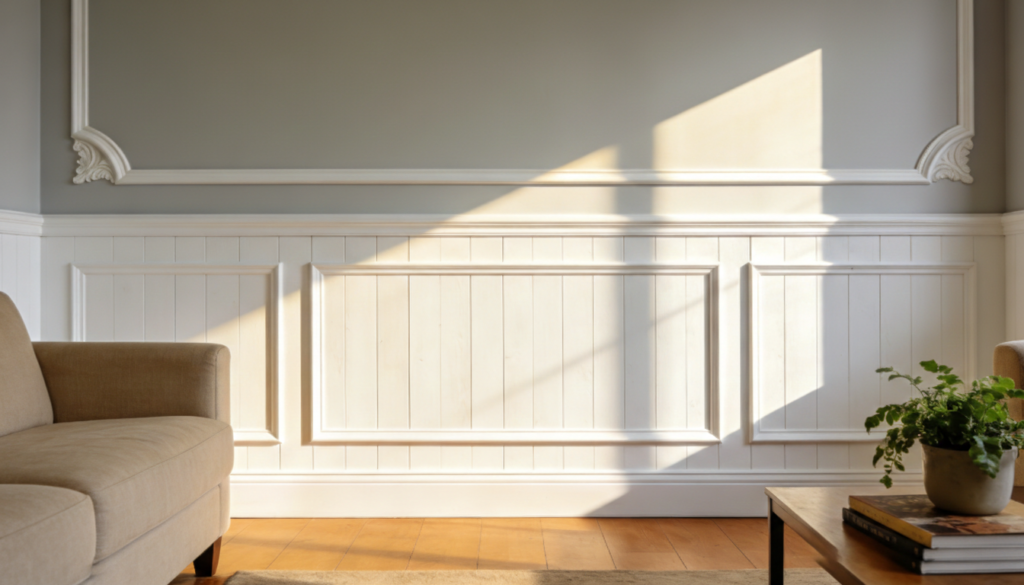
Wainscoting: Wainscoting—wall trim covering the lower third of walls—combines multiple trim pieces creating paneled effects.
Classic Wainscoting Styles:
- Raised panel wainscoting for traditional elegance
- Flat panel wainscoting for simpler sophistication
- Beadboard wainscoting for cottage charm
- Board and batten for modern farmhouse appeal
Door and Window Casing: Casing trim frames doors and windows, creating finished, polished appearances.
Design Coordination:
- Should coordinate with other room trim
- Available in matching profiles to baseboards and crown
- Ranges from simple to ornate depending on style
- Significantly impacts overall room cohesion
Wall Trim Profile Styles
Understanding profile styles helps select trim appropriate for your design aesthetic.
Traditional Profiles: Traditional wall trim features curves, details, and ornamental elements.
Characteristics:
- Ogee curves and decorative details
- Multiple layers creating depth
- Classical architectural influences
- Works in formal, traditional living rooms
- Available in various complexity levels
Transitional Profiles: Transitional trim bridges traditional and contemporary, offering refined simplicity.
Design Balance:
- Cleaner than traditional but not stark
- Subtle detailing without excessive ornamentation
- Works across multiple design styles
- Provides safe middle-ground option
- Suits most living room aesthetics
Modern/Contemporary Profiles: Modern wall trim emphasizes clean lines and geometric simplicity.
Minimalist Characteristics:
- Flat or simple angular profiles
- Minimal ornamentation
- Emphasis on proportion rather than detail
- Works in contemporary and minimalist living rooms
- Creates sophisticated restraint
Craftsman Profiles: Craftsman trim features substantial, honest profiles emphasizing quality materials.
Arts and Crafts Influence:
- Wider, more substantial proportions
- Clean, straightforward designs
- Emphasis on wood grain and natural materials
- Horizontal emphasis
- Perfect for bungalows and craftsman-style homes
Design Strategies: Using Wall Trim in Living Rooms
Creating Architectural Interest with Crown Molding
Crown molding provides the single most impactful wall trim addition for living rooms.
Simple Crown Installation: Single-piece crown molding adds elegance without overwhelming contemporary or transitional spaces.
Design Applications:
- 3-4 inch crown for standard 8-foot ceilings
- 5-6 inch crown for 9-10 foot ceilings
- Painted to match ceiling for seamless integration
- Creates clean, finished appearance
- Suits modern farmhouse, transitional, and contemporary styles
Elaborate Multi-Piece Crown: Combining multiple molding pieces creates dramatic, luxury crown assemblies.
Traditional Elegance:
- Builds crown from multiple coordinating profiles
- Creates 8-12 inch crown assemblies
- Adds significant visual weight and grandeur
- Perfect for traditional and formal living rooms
- Best suited to higher ceilings (10+ feet)
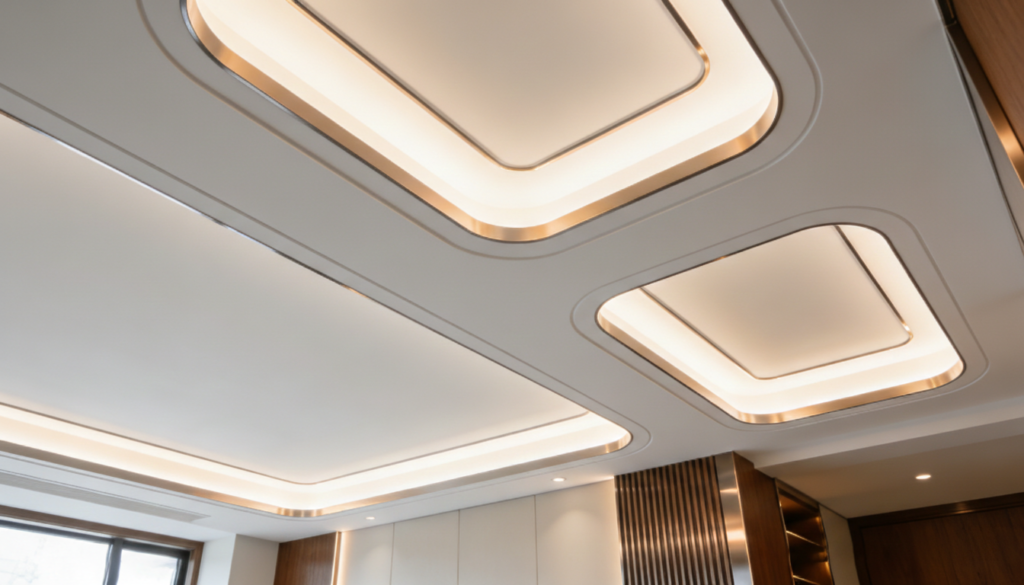
Coffered Ceiling Integration: Crown molding integrates with coffered ceiling designs for maximum architectural drama.
Sophisticated Applications:
- Crown outlines each ceiling coffer
- Creates museum-quality architectural detail
- Requires substantial ceiling height
- Delivers ultimate traditional elegance
- Significant investment in time and materials
Painted vs. Stained Crown: Color decisions dramatically impact crown molding’s visual effect.
Painted Crown:
- White or ceiling-color creates seamless, height-emphasizing effect
- Contrasting colors add definition and drama
- Works across all design styles
- Easier to maintain than stained wood
Stained Wood Crown:
- Natural wood grain adds warmth and character
- Creates craftsman or traditional appeal
- Requires coordination with other wood elements
- Higher maintenance than painted trim
Panel Molding for Sophisticated Wall Treatment
Panel molding (picture frame molding) creates designer wall treatments adding architectural sophistication.
Classic Wainscoting Effect: Installing panel molding on lower wall sections creates traditional wainscoting.
Design Strategy:
- Install panels from floor to 32-48 inches high
- Space panels evenly with consistent proportions
- Paint panels and wall different colors for dimension
- Creates formal, traditional living room character
- Protects walls in high-traffic areas
Full-Wall Panel Treatments: Extending panels to full wall height creates dramatic, library-like elegance.
Sophisticated Applications:
- Floor-to-ceiling panels on accent walls or entire room
- Creates rich, layered architectural detail
- Perfect backdrop for formal furniture arrangements
- Adds significant perceived value
- Best in larger living rooms with adequate space
Accent Wall Panels: Applying panel molding to a single accent wall creates focal points without overwhelming.
Strategic Placement:
- Behind sofa creating visual anchor
- Fireplace wall emphasizing focal point
- Entry wall making strong first impressions
- Television wall adding sophistication to media areas
Panel Sizing and Proportions: Proper panel dimensions ensure professional, balanced results.
Proportion Guidelines:
- Panels should be taller than wide (typically 1.5:1 or 2:1 ratio)
- Space panels to avoid awkward narrow sections at wall ends
- Maintain consistent spacing between panels
- Consider golden ratio (1:1.618) for classical proportions
- Account for electrical outlets and switches in layout
Color and Finish Strategies:
Monochromatic Approach:
- Same color for panels and walls in different sheens
- Creates subtle, sophisticated dimension
- Suits contemporary and transitional styles
- Maintains visual calm and spaciousness
Contrasting Colors:
- Dark panels with light walls or vice versa
- Creates bold, dramatic statements
- Traditional approach for wainscoting
- Adds visual interest and definition
Wallpaper Inside Panels:
- Frame wallpaper within panel molding
- Adds pattern without overwhelming
- Creates custom, high-end appearance
- Perfect for accent walls
Chair Rail Applications in Living Rooms
Chair rail molding divides walls horizontally, creating design opportunities and visual interest.
Traditional Two-Tone Walls: Chair rail enables classic two-tone wall treatments.
Color Strategies:
- Darker lower section, lighter upper (traditional approach)
- Lighter lower section, darker upper (contemporary inversion)
- Coordinating colors from same family
- Bold contrast for dramatic impact
Creating Visual Balance: Chair rail installation height affects room proportions.
Height Guidelines:
- Standard chair rail: 32-36 inches from floor
- Lower installation (28-30 inches) emphasizes wall height
- Higher installation (38-42 inches) works in tall-ceiling rooms
- Align with window sills when possible for cohesion
Material Combinations Below Chair Rail: Chair rail creates natural division for different wall treatments.
Creative Applications:
- Wainscoting below, paint above
- Wallpaper below, paint above
- Painted panels below, wallpaper above
- Wood planking below, paint above
Baseboard Strategies for Polished Foundations
Baseboards provide essential finishing details that complete living room designs.
Tall Baseboards for Modern Impact: Oversized baseboards create contemporary, substantial appearances.
Contemporary Applications:
- 6-8 inch tall baseboards
- Simple, clean profiles
- Creates modern, grounded aesthetic
- Works beautifully with minimal crown or no crown
- Particularly effective in modern farmhouse and contemporary styles
Traditional Detailed Baseboards: Ornate baseboards complement traditional living room styles.
Classic Characteristics:
- 4-6 inch height with detailed profiles
- Coordinates with elaborate crown molding
- May include separate base cap molding
- Creates cohesive traditional aesthetic
Baseboard and Floor Coordination: Baseboard color decisions affect perceived floor and ceiling height.
Visual Effects:
- Baseboards matching floor color make rooms feel larger
- Contrasting white baseboards create crisp definition
- Dark baseboards ground spaces and hide scuffs
- Stained baseboards coordinate with hardwood floors
Corner Blocks and Plinth Blocks: Decorative blocks at baseboard corners and door frames add traditional detail.
Architectural Elements:
- Corner blocks (rosettes) at inside and outside corners
- Plinth blocks where baseboards meet door casings
- Adds craftsman and Victorian character
- Creates professional, finished appearance
- Eliminates difficult miter cuts
Wall Trim for Different Living Room Styles
Traditional and Formal Living Rooms
Traditional living rooms benefit from elaborate, detailed wall trim creating elegant sophistication.
Essential Traditional Trim Elements:
- Substantial crown molding (5-8 inches or multi-piece assemblies)
- Detailed baseboards with base cap molding
- Chair rail with wainscoting or panel molding
- Ornate door and window casings
- Picture rail in high-ceiling rooms
- Decorative corner blocks and rosettes
Color Strategies for Traditional Trim:
- Classic white trim against colored walls
- Cream or ivory for softer traditional appeal
- Stained wood trim in rich, warm tones
- Coordinated trim and ceiling for seamless flow
Material Choices:
- Solid hardwood for authentic traditional character
- High-quality MDF with detailed profiles for painted finishes
- Polyurethane for complex profiles at lower cost
- Custom millwork for ultimate luxury
Modern and Contemporary Living Rooms
Modern living rooms embrace clean-lined, minimal wall trim that adds definition without decoration.
Contemporary Trim Approach:
- Simple, flat baseboards (4-6 inches)
- Minimal or no crown molding
- Clean, angular window and door casings
- Panel molding with simple, geometric profiles
- Emphasis on proportion over ornamentation
Modern Color Strategies:
- Monochromatic schemes (trim matches walls)
- Contrasting black or dark gray trim
- Crisp white trim for definition
- Different sheens creating subtle dimension
Minimalist Installation:
- Fewer trim elements overall
- Emphasis on clean lines and joints
- Concealed fasteners when possible
- Integrated trim blending with architecture
Farmhouse and Rustic Living Rooms
Farmhouse style combines traditional trim elements with casual, accessible charm.
Modern Farmhouse Trim:
- Substantial, simple baseboards (5-7 inches)
- Simple crown molding or exposed beams
- Board and batten accent walls
- Shiplap with trim details
- Painted white or warm neutrals
Rustic Trim Applications:
- Rough-hewn wood beams and trim
- Natural wood finishes showing grain
- Wider, chunkier proportions
- Hand-hewn or distressed appearances
- Integration with stone and brick elements
Farmhouse Color Palettes:
- Classic white for bright, fresh appeal
- Warm neutrals (cream, beige, greige)
- Natural wood stains
- Soft, muted colors
Craftsman and Bungalow Living Rooms
Craftsman style emphasizes quality materials, substantial proportions, and honest construction.
Craftsman Trim Characteristics:
- Wide, flat casing profiles (4-6 inches)
- Substantial baseboards (6-8 inches)
- Horizontal emphasis
- Natural wood finishes or period-appropriate paints
- Built-in bookcases and window seats with integrated trim
Arts and Crafts Details:
- Through-tenon details showing joinery
- Decorative brackets and corbels
- Plate rails and picture rails
- Wood beam ceilings with trim integration
- Quarter-sawn oak or other quality hardwoods
Material Selection for Wall Trim
Wood Trim Options
Solid Hardwood: Premium solid wood trim offers authentic quality and natural beauty.
Advantages:
- Can be stained showing natural grain
- Accepts paint beautifully
- Durable and long-lasting
- Adds genuine value
- Available in various species
Common Species:
- Oak: Traditional choice, pronounced grain
- Maple: Smooth, fine grain, excellent for painting
- Poplar: Cost-effective hardwood, paints well
- Pine: Softwood option, economical, accepts paint
- Cherry/Walnut: Premium choices for stained trim
Disadvantages:
- Higher cost than alternatives
- Can warp or split if improperly stored
- More challenging to work with
- Requires skill for professional results
MDF (Medium-Density Fiberboard): Engineered MDF provides smooth, stable surfaces ideal for painted wall trim.
Advantages:
- Perfectly smooth surface for flawless paint
- Dimensionally stable (doesn’t warp)
- Less expensive than hardwood
- Accepts intricate profiles well
- Consistent quality
Disadvantages:
- Cannot be stained (no wood grain)
- Heavier than solid wood
- More susceptible to moisture damage
- Can’t support heavy loads without backing
Finger-Jointed Pine: Short pine pieces joined together create longer trim lengths economically.
Advantages:
- More affordable than clear pine
- Accepts paint well
- Stable construction
- Available in standard profiles
Disadvantages:
- Joints visible if staining
- Not suitable for natural finishes
- Requires painting
Alternative Trim Materials
Polyurethane Trim: Molded polyurethane replicates wood profiles without wood’s limitations.
Advantages:
- Lightweight and easy to install
- Moisture-resistant
- Won’t warp, crack, or split
- Available in elaborate profiles
- Factory-primed or finished
Disadvantages:
- Can look less authentic than wood
- Limited paint color flexibility once installed
- May yellow over time
- Not suitable for staining
PVC Trim: Cellular PVC offers waterproof, rot-proof trim solutions.
Advantages:
- Completely moisture-resistant
- Won’t rot, warp, or deteriorate
- Easy to cut and install
- Accepts paint well
- Ideal for high-humidity areas
Disadvantages:
- Can expand/contract with temperature
- Requires special adhesives
- Cannot be stained
- Feels different from wood
Flexible Trim: Rubber or polyurethane flexible trim accommodates curved walls and arches.
Specialized Applications:
- Curved walls and archways
- Rounded corners
- Custom curved designs
- Otherwise impossible applications
Installation Considerations
DIY vs. Professional Installation
DIY Wall Trim Installation:
Suitable Projects:
- Simple baseboard installation
- Basic crown molding in rectangular rooms
- Picture frame molding on flat walls
- Straight chair rail runs
Required Skills:
- Accurate measuring and marking
- Precise miter and bevel cutting
- Comfortable with power tools (miter saw, nail gun)
- Understanding of angles and geometry
- Patience for detail work
Cost Savings: DIY installation typically saves 50-70% compared to professional installation, though time investment is substantial.
Professional Installation Recommended:
Complex Projects:
- Cathedral or vaulted ceilings
- Rooms with unusual angles
- Multi-piece crown assemblies
- Extensive panel molding layouts
- Integration with existing architectural details
Professional Advantages:
- Expert measurement and cutting
- Professional-quality joints and finishes
- Faster completion
- Guaranteed results
- Specialized tools and experience
Critical Installation Techniques
Proper Joint Execution: Quality wall trim installation requires excellent joint work.
Joint Types:
- Miter joints: 45-degree corners for outside corners and crown molding
- Coped joints: Professional inside corner technique for baseboards and crown
- Scarf joints: Joining two pieces along a run
- Butt joints: Simple end-to-end joints (used sparingly)
Professional Results:
- Tight joints without gaps
- Proper caulking concealing minor imperfections
- Consistent reveal around doors and windows
- Level and plumb installation throughout
Fastening Methods:
Adhesive Application:
- Apply construction adhesive to back of trim
- Reduces nail holes requiring filling
- Creates stronger, more permanent bond
- Essential for heavy crown molding
Nail Placement:
- Use finish nails or brad nails appropriate to trim size
- Nail into studs when possible for secure attachment
- Angle nails slightly for better grip
- Countersink nails for invisible filling
Finishing Touches:
Preparation for Painting:
- Fill nail holes with quality wood filler
- Caulk all joints, seams, and wall gaps
- Sand smooth once filler dries
- Prime bare wood before painting
Paint Application:
- Use quality trim paint (semi-gloss or satin)
- Apply thin, multiple coats for smooth finish
- Cut in carefully along walls
- Consider professional painting for flawless results
Budget Considerations and Cost Analysis
Material Costs
Budget-Friendly Options ($1-$3 per linear foot):
- Finger-jointed pine baseboards and casing
- Simple MDF profiles
- Basic colonial or ranch-style profiles
- DIY installation
Mid-Range Options ($3-$7 per linear foot):
- Quality MDF with detailed profiles
- Solid pine or poplar trim
- Moderate crown molding profiles
- Combination of DIY and professional work
Premium Options ($7-$20+ per linear foot):
- Solid hardwood (oak, maple, cherry)
- Custom milled profiles
- Elaborate multi-piece assemblies
- Professional installation throughout
Labor Costs
Professional installation typically costs $2-$8 per linear foot depending on:
- Trim complexity and profile
- Room configuration and difficulty
- Ceiling height
- Geographic location
- Contractor expertise
Typical Living Room Projects:
Basic Baseboard Update (15×20 room):
- Materials: $150-$400
- Labor: $300-$600
- Total: $450-$1,000
Crown Molding Addition (15×20 room):
- Materials: $200-$600
- Labor: $500-$1,200
- Total: $700-$1,800
Complete Trim Package (baseboards, crown, door/window casings):
- Materials: $500-$1,500
- Labor: $1,200-$3,000
- Total: $1,700-$4,500
Elaborate Panel Molding Accent Wall:
- Materials: $300-$800
- Labor: $800-$2,000
- Total: $1,100-$2,800
Cost-Saving Strategies
Prioritize High-Impact Areas:
- Install crown molding first for maximum visual impact
- Update baseboards next for polished foundations
- Add panel molding or chair rail as budget allows
Mix Materials Strategically:
- Use solid wood for visible stained trim
- Choose MDF for painted applications
- Reserve premium materials for focal points
Phased Installation:
- Complete one room or wall at a time
- Spread costs across multiple budget periods
- Refine skills on less visible areas first
DIY What You Can:
- Handle simple baseboard installation yourself
- Hire professionals for complex crown or panels
- Do your own painting and finishing
- Save 40-60% through strategic DIY
Maintenance and Longevity
Caring for Wall Trim
Regular Cleaning:
- Dust trim regularly with microfiber cloths
- Clean with mild soap and water as needed
- Avoid harsh chemicals damaging paint or wood
- Pay attention to accumulated dust on crown molding
Touch-Up and Repair:
- Address nail pops by re-nailing and filling
- Touch up paint chips and scratches promptly
- Re-caulk separated joints as needed
- Sand and refinish damaged areas
Periodic Repainting:
- Repaint trim every 7-10 years in average conditions
- Address wear in high-traffic areas more frequently
- Use quality paint extending time between repaints
- Consider professional painting for complex trim
Long-Term Value
Return on Investment: Quality wall trim significantly increases perceived home value. Real estate professionals consistently note that homes with attractive trim details:
- Sell faster than comparable homes without trim
- Command premium prices (3-7% higher valuations)
- Appeal to quality-conscious buyers
- Photograph better for listings
- Create memorable first impressions
Timeless Appeal: Unlike trendy finishes that date quickly, quality wall trim remains stylish across decades. Well-executed trim work installed today will remain attractive for 30-50+ years, making it one of home improvement’s best long-term investments.
Frequently Asked Questions
Q: What type of wall trim adds the most value to a living room? A: Crown molding typically provides the highest visual impact and value addition for living rooms. It draws eyes upward, emphasizes ceiling height, and creates sophisticated elegance that buyers appreciate. For maximum effect, choose crown molding proportional to your ceiling height—3-5 inches for standard 8-foot ceilings, 5-7 inches for 9-10 foot ceilings. Combined with updated baseboards, crown molding creates polished, high-end appearance significantly increasing perceived room value.
Q: Can I install wall trim myself, or should I hire a professional? A: Competent DIYers can successfully install simple wall trim like baseboards and basic crown molding in rectangular rooms. You’ll need basic carpentry skills, comfort with power tools (especially miter saws), and patience for detail work. However, professional installation is recommended for complex projects including cathedral ceilings, intricate panel molding layouts, multi-piece crown assemblies, and rooms with unusual angles. Professionals ensure perfect joints, proper alignment, and flawless finishes that DIY installations may not achieve.
Q: What’s the difference between MDF and solid wood trim? A: MDF (medium-density fiberboard) is engineered wood product offering perfectly smooth surfaces ideal for painted trim at lower cost than solid wood. It won’t warp and accepts intricate profiles well, but cannot be stained and is heavier than wood. Solid wood trim can be stained showing natural grain, is lighter weight, and feels more premium, but costs more and can warp if improperly stored. For painted trim, MDF provides excellent results; for stained trim, solid wood is required.
Q: How much does wall trim cost for an average living room? A: Costs vary significantly based on trim type and installation method. Basic baseboard updates cost $450-$1,000 for typical 15×20 foot living rooms. Crown molding additions run $700-$1,800. Complete trim packages (baseboards, crown, door/window casings) cost $1,700-$4,500. Premium materials, elaborate profiles, and professional installation increase costs. DIY installation reduces expenses by 50-70% but requires time and skills.
Q: Should wall trim match throughout the entire house? A: Generally, yes—consistent trim throughout homes creates cohesive, professional appearance. Use matching baseboard and casing profiles in all rooms, coordinate crown molding when used, and maintain consistent paint colors or stain finishes. However, you can vary trim complexity between spaces (elaborate trim in formal living rooms, simpler trim in casual areas) while maintaining compatible profiles and colors. Consistency particularly matters for trim visible in connected spaces or hallway sightlines.
Q: What color should I paint wall trim? A: White remains the most popular and versatile wall trim color, creating clean definition and working with any wall color. However, other options include cream or off-white for softer, warmer appeal, trim matching wall color in same or different sheen for contemporary monochrome, dark trim (black, navy, charcoal) for bold modern statements, and natural wood stains for warmth and character. Consider your overall design style, wall colors, and personal preferences. Always test colors in your specific lighting before committing.
Q: How tall should baseboards be in a living room? A: Standard baseboards measure 3-5 inches tall and work well in most living rooms. However, taller baseboards (6-8 inches) create more substantial, contemporary appearances and work particularly well in rooms with higher ceilings or modern aesthetics. Traditional homes often feature 4-5 inch baseboards, while modern farmhouse and contemporary styles embrace taller 6-7 inch options. Ensure baseboard height balances with ceiling height and room scale—taller baseboards in larger rooms, standard heights in smaller spaces.
Q: Can I add wall trim to a room with textured walls? A: Yes, but textured walls present challenges. Trim may not sit flush against heavily textured surfaces, creating gaps requiring extensive caulking. Options include installing trim and caulking gaps carefully, skim-coating walls smooth before trim installation (more work but better results), or choosing trim styles that minimize wall contact (crown molding, picture rail). For best results, consider smoothing at least the areas where trim will be installed, or use flexible caulk generously to fill texture gaps.
Q: What’s the best wall trim for small living rooms? A: Small living rooms benefit from simplified wall trim that adds sophistication without overwhelming limited space. Choose simple, clean profiles rather than elaborate ornate trim, use moderate baseboard heights (4-5 inches) rather than oversized options, consider crown molding in lighter, simpler profiles (3-4 inches), and paint trim the same color as walls in different sheen for subtle definition. Avoid heavy, dark trim that visually shrinks spaces, and skip chair rails and wainscoting that can chop up walls making rooms feel smaller.
Q: How do I choose between traditional and modern wall trim styles? A: Your choice should reflect your home’s architecture, existing features, and personal aesthetic preferences. Traditional trim (detailed profiles, ornate crown, panel molding) suits formal living rooms, period homes, and classic design preferences. Modern trim (clean lines, minimal detail, substantial but simple profiles) works in contemporary homes, minimalist spaces, and modern farmhouse styles. Transitional trim bridges both, offering refined simplicity working across styles. Consider your furniture style, home architecture, and long-term plans when selecting—neutral transitional trim provides maximum flexibility.
Conclusion: Transforming Your Living Room with Wall Trim
Wall trim represents one of the most effective ways to elevate your living room from basic to beautiful, transforming ordinary walls into sophisticated architectural features that define your space’s character and style. Whether you choose elaborate crown molding creating traditional elegance, clean modern profiles delivering contemporary sophistication, or charming farmhouse board and batten adding casual refinement, the right wall trim dramatically enhances your living room’s visual appeal, perceived value, and overall atmosphere.
Success with wall trim lies in thoughtful selection matching your design aesthetic, quality materials appropriate for your budget and requirements, proper installation ensuring professional results, and cohesive coordination with your room’s existing features and furnishings. The principles and strategies outlined in this guide provide the foundation for confident decision-making, whether you’re planning comprehensive trim additions or focused updates to specific areas.
Remember that wall trim investments yield long-term returns extending far beyond initial installation. Quality trim work enhances daily living enjoyment, increases home market value, creates timeless architectural interest, and provides frameworks for future design evolution as tastes change and trends shift. Unlike many home improvements requiring periodic updates, well-executed wall trim remains beautiful and relevant for decades.
As you plan your wall trim project, start by clearly defining your style preferences and design goals, honestly assessing your DIY capabilities versus professional needs, setting realistic budgets accounting for materials and labor, creating detailed plans ensuring proper proportions and spacing, and gathering inspiration from successful installations in similar spaces.
Whether you begin with simple baseboard updates creating polished foundations, add crown molding for immediate dramatic impact, or undertake comprehensive trim packages transforming entire rooms, wall trim offers accessible, achievable opportunities for creating the elegant, stylish living room you’ve always envisioned. Your living room serves as your home’s heart—make it extraordinary with beautiful wall trim that reflects your unique style while creating welcoming, sophisticated spaces where life’s best moments unfold.
Transform your living room with wall trim that delights, inspires, and endures.